

This simple necklace is a great project for almost any age. It’s pretty quick too. If you prep the supplies: Cut out the circles and already have the clasps on the cord it will only take around 10-15 minutes to make.

Supplies:
- Washers- I purchased a bunch of 1.5″ & 7/8″ washers at Home Depot. Both of these washers had a 3/8″ opening in the center. Just FYI The washers I purchased were very thick and strong, I tried to use my metal stamping set on the washers but they wouldn’t make an impression. That’s when I switched over to the paper idea and I really like how it turned out!
- Scrapbook Paper– There are so many options at the craft store for fun prints and designs to choose from!
- Cricut- A Cricut machine is not essential but it does make this project 100x’s easier!
- Black jewelry cord with simple clasp- You can purchase them separately but on Amazon they have sets of 60 with clasps already on them! See them HERE.
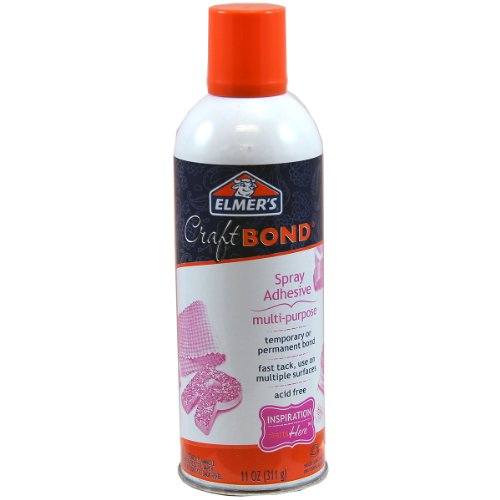
- Spray Adhesive- The best way to adhere the paper to the washer, you can also use a glue stick but I prefer the spray.
- Mod Podge Dimensional Magic– This is such a great product that creates a pretty epoxy-like finish to the top of the washers. It seals the paper and adds a thick clear gloss layer.
- Paintbrush- You’ll need a small paintbrush to smooth out the mod podge.
- Plastic or Paper– To cover your work surface you’ll want some type of covering. I always have 1 or 2 plastic tablecloths in the craft room for projects like this.
Tips for Making Washer Necklaces:
- Cutting the Circles: I cut out the paper circles with my Cricut Explore, for the simplify circle I used the print and cut feature to first print it out with the words and then pop it into the Cricut and cut it out, it worked like a dream.
If you don’t have a cutting machine you can easily trace around the washer and cut it out with scissors and use an Exacto knife for the center. If you’re only making a few necklaces it won’t be a big deal, if you’re prepping for 40 necklaces it will take you some time.
- Experiment with other materials: Nail polish paints really well onto the washers, you could easily add glitter if you wanted or gems. Let your creativity guide you!

Tips for making the washer necklace with a big group:
- Prep ahead! We did a lot of prep so that the craft took minimal time, seeing as we were outside and didn’t have a lot of time in the schedule to spend on it. I cut out all the circles with lots of different print options and the simplify circles were already cut out as well. You can also put the clasps on the cording so the necklaces are already finished, so essentially all those making the craft had to do was to spray adhesive the paper to the washer and then put the Mod Podge on top.
- Set up the space. In the picture below you can see our set up at the campout for the group craft. I used plastic table cloths, I had all the washers and cut circles easily accessible in disposable bowls. We had spray adhesive and other glue options and multiple bottles of dimensional magic and paintbrushes. We also provided nail polish in case someone wanted a solid color instead of the printed scrapbook paper.
- Keep it Simple. Whenever I’m teaching a craft in a large group I make sure the instructions are simple because I know I’ll be repeating myself over and over. This craft, when steps are prepped ahead, takes 10 minutes to complete. It was perfect for the campout because the craft wasn’t the main attraction, it was just a fun side activity to complete.
I’m a huge fan of handmade jewelry! You might also like my tutorial on Polymer Clay Earrings and this DIY Painted Wood Bead Necklaces
If you do this with a large group be sure and let me know! I love to see when you use crafts and projects from the blog. Leave a comment or tag me on instagram @handmadeintheheartland or facebook !


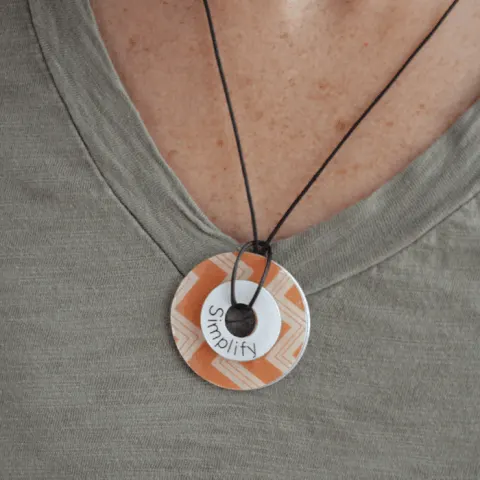
DIY Washer Necklaces
This simple diy washer necklace is a very inexpensive and customizable craft! It's a great jewelry craft to make at a campout or activity for a large group of people.
Materials
- Spray Adhesive
- Black jewelry cord with clasp
- 2 different size washers, we used 1 1/2″ & 7/8″ which both had 3/8″ openings in the center
- Scrapbook Paper
- Mod Podge Dimensional Magic
Tools
- Paintbrush
- Cricut Machine or Exacto Knife
Instructions
- Prep your supplies. Cut the scrapbook paper to the same size as the washer. You can easily do this on a Cricut machine or with a compass and scissors/ Exacto knife.
- Create a workspace with paper or plastic so the spray adhesive doesn't get on
- Using spray adhesive attach the scrapbook paper circles to the metal washers.
- Pour a small amount of Mod Podge dimensional magic on top of the paper. I usually do a few drops at 4 different spots.
- Using a paintbrush spread the Mod Podge evenly over the circle and let dry for several hours.
- Once the washers are dry take your necklace folded in half and stick it through the center of the washers and then take the clasp end and stick it through the fold of the cord.
Recommended Products
As an Amazon Associate and member of other affiliate programs, I earn a small commission if you purchase something I recommend. I would never recommend products I don't love and use!


Marianne Armstrong
Wednesday 7th of April 2021
Where did you get the little washers with the words on them?
Angela Muir
Thursday 22nd of April 2021
Hi Marianne, The words are actually printed on white printer paper, I explain in the post: for the simplify circle I used the print and cut feature to first print it out with the words and then pop it into the Cricut and cut it out, it worked like a dream.