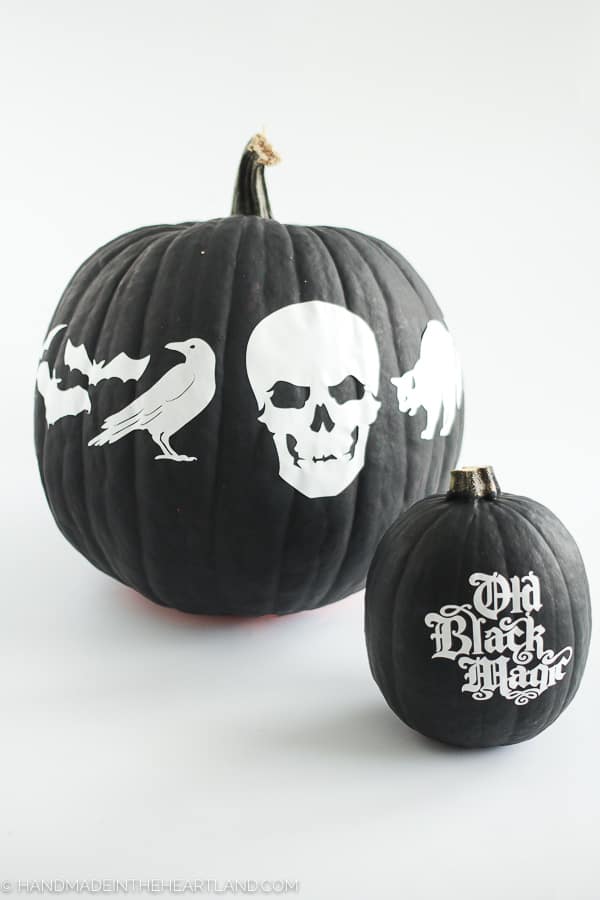
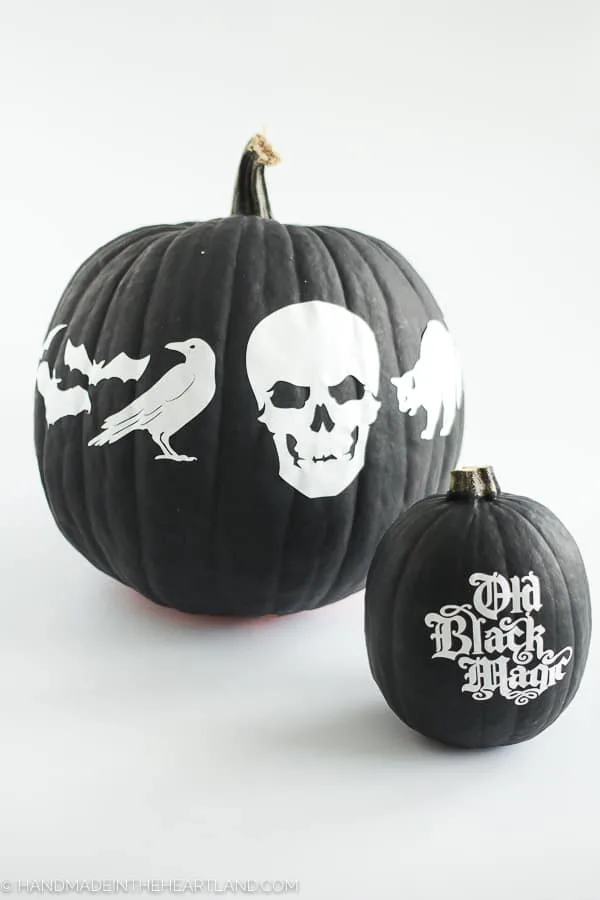
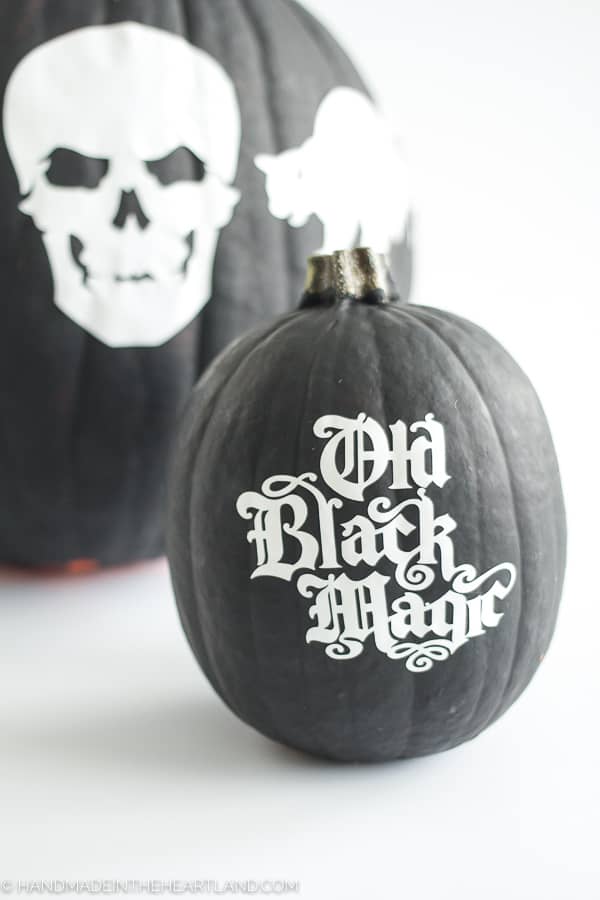
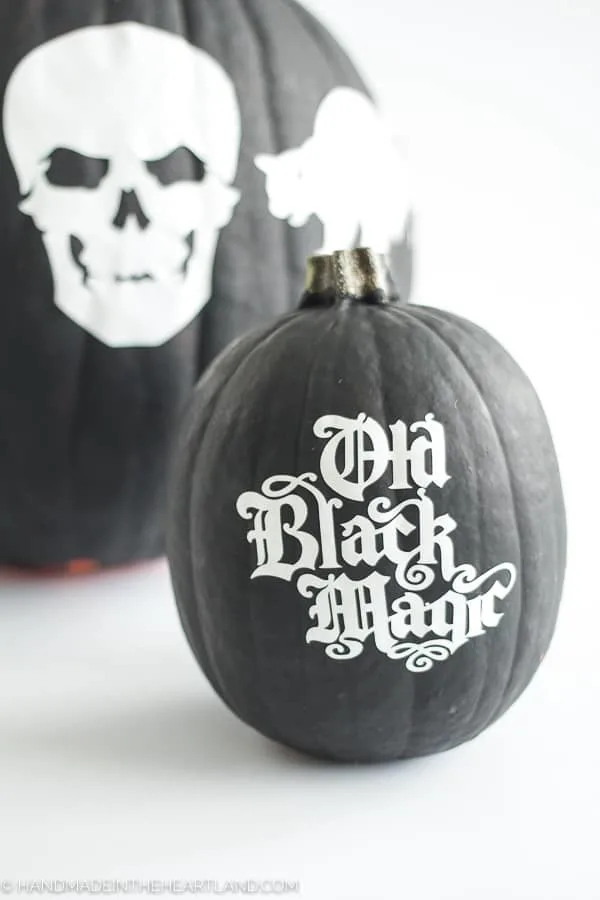
I’m always looking for alternatives to carving pumpkins and these Cricut cut vinyl stickers might be my new favorite way to decorate Halloween pumpkins.
This post contains affiliate links, which means I make a small commission if you purchase something I recommend.
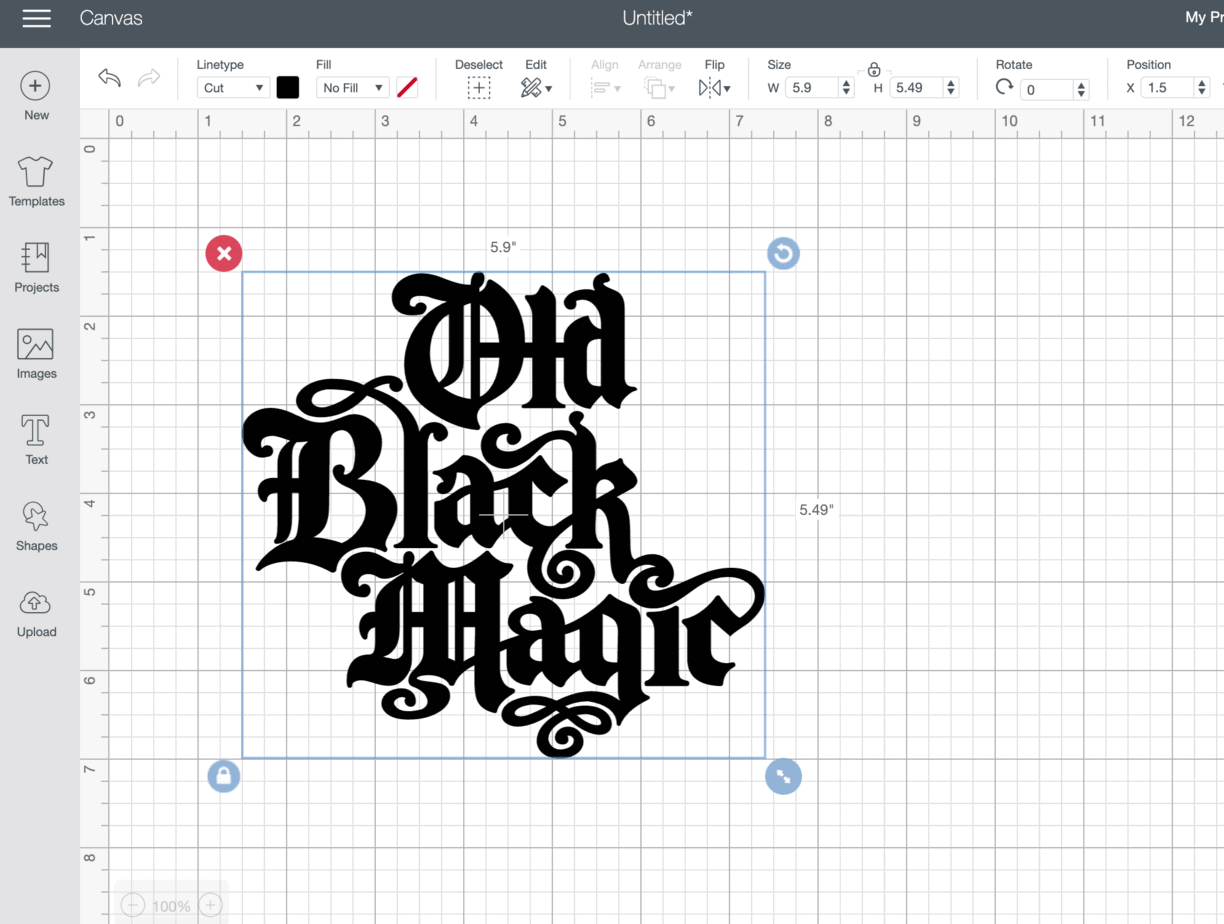
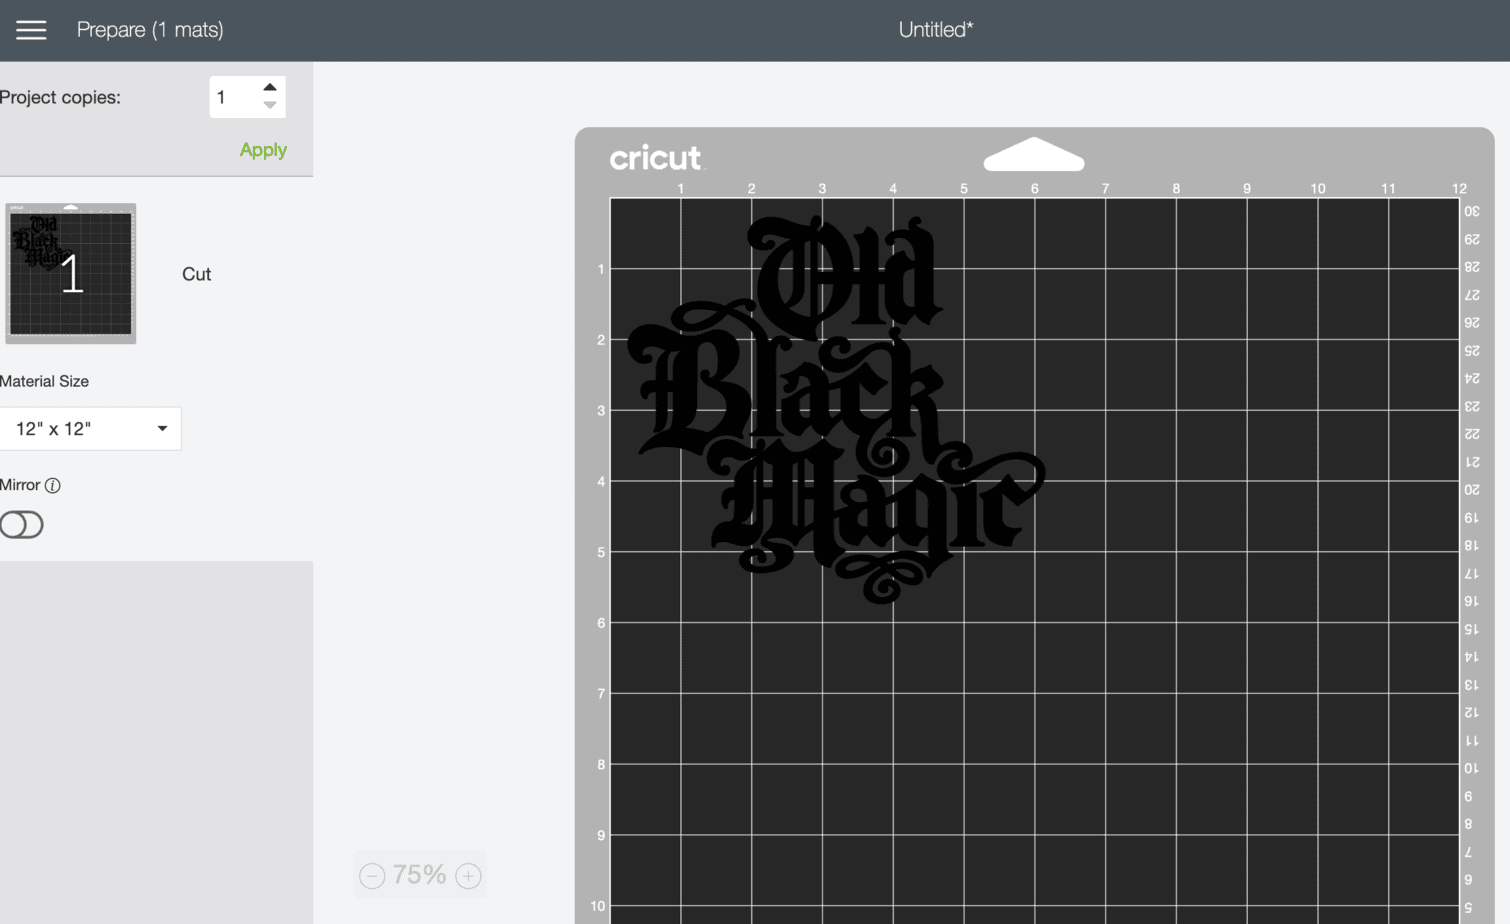
How to create vinyl pumpkin stickers with a Cricut
Cutting vinyl with a Cricut Explore or Maker is one of my favorite uses for the machine. You can create so many amazing looking projects at home with vinyl. These pumpkins are a great example of a homemade craft looking SO good!
To create a vinyl Halloween pumpkin sticker you’ll need a good quality vinyl. I recommend permanent vinyl for this project so you know it will adhere to the pumpkin. I like Oracal 651 because it is permanent and water-resistant and will withstand exposure to the elements and stay put!
For this project you only need a few supplies: Vinyl and Transfer Tape. If you want the background of your pumpkin to be a different color you can paint it! I painted mine black with craft paint and let it completely dry before I attached the stickers.
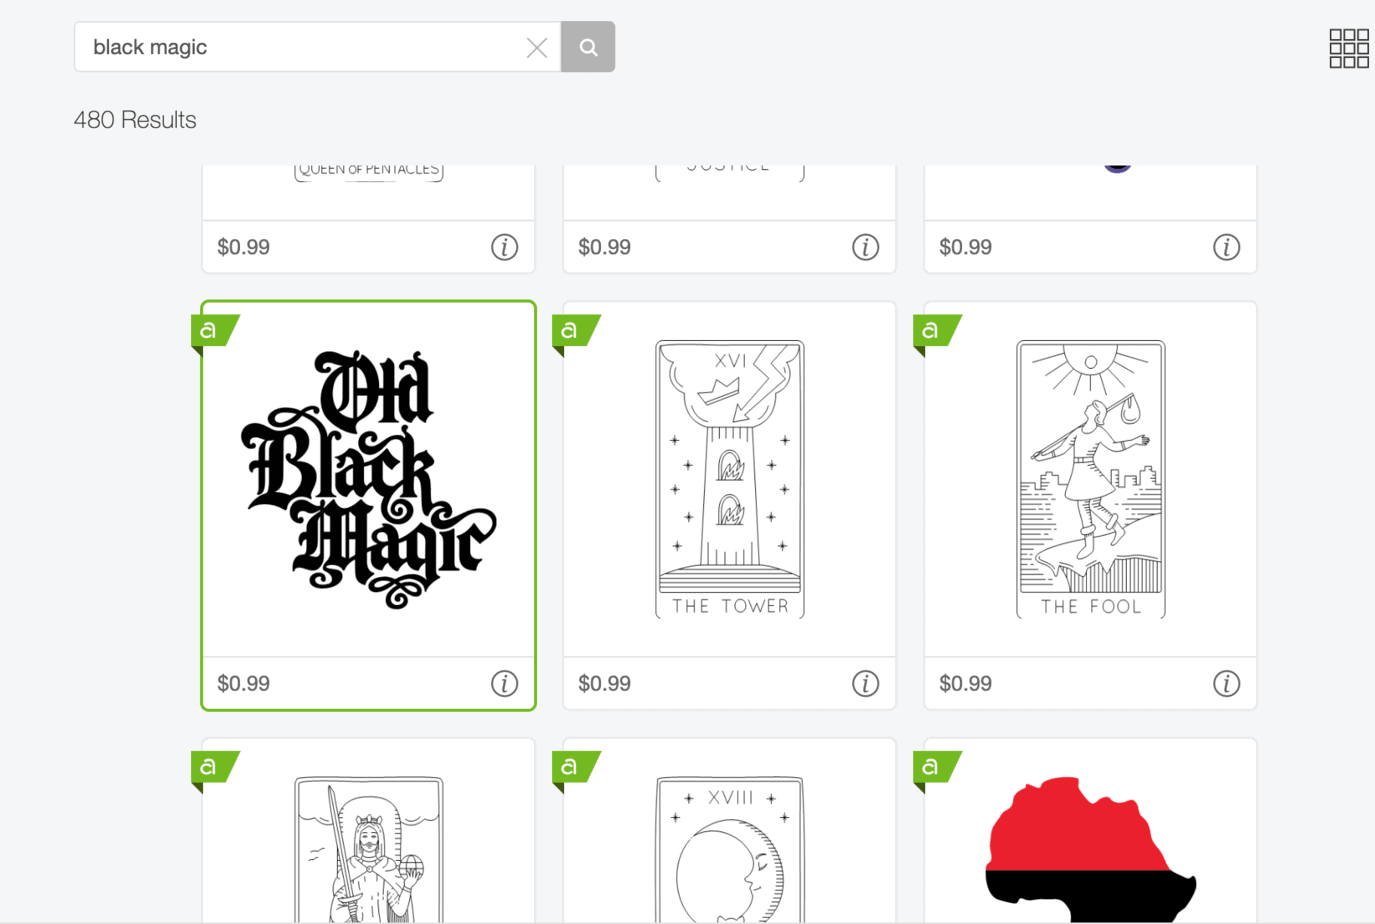
Where to get Halloween images to cut with Cricut
How will you decorate your Halloween pumpkins? What images do you want to cut with vinyl? The options are endless. Here are 4 places you can get Halloween SVG cut files to make Cricut cut vinyl sticker pumpkins.
- Cricut Design Space– is always my go to first stop. When you get into design space and navigate to the left side menu “images” you can type in the search bar for specific words like Halloween, Black Cat, Skull, etc. If Cricut doesn’t have something you love there are other websites that sell SVG files.
- Etsy– There are so many great designers who sell their SVG files on Etsy.
- Design Bundles– Another fun site that sells SVG files
- Craft Bundles– And yet another site that sells great SVG files
Looking for the right file can be a little overwhelming since there are SO many options. I recommend thinking about exactly what you want and searching for more specific words like “black cat” or “halloween skull” because if you just type in Halloween you’ll get 426,000 options. ha!
How to apply vinyl stickers to a pumpkin
To adhere adhesive vinyl after It’s cut on the Cricut transfer tape or contact paper is typically used. If your shape is a super simple silhouette, like the skull or bats on my larger pumpkin you can just take it off the backing with your fingers and apply like you would a normal sticker.
However if your design is large, has details or needs to be spaced a certain way with different pieces you’ll want to transfer it with another sticky paper.
I really like just dollar store contact paper when I run out of the more expensive transfer tape. The Cricut transfer tape is VERY sticky so if I use it I usually put the sticky side on a t-shirt or something a few times to get rid of a little of the stickiness.

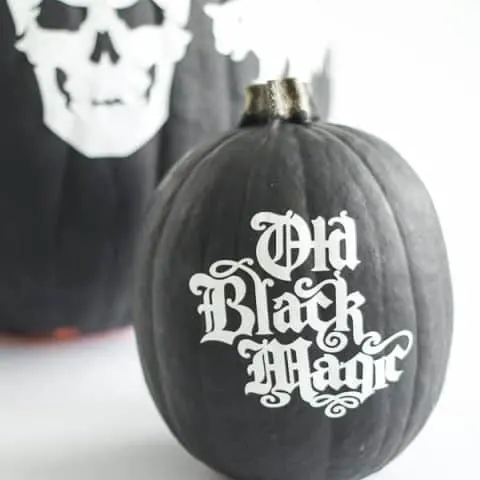
Cricut Cut Vinyl Sticker Pumpkins
Creating custom vinyl stickers to decorate pumpkins for Halloween is so easy and so fun with a Cricut machine!
Materials
Tools
Instructions


 - Cut the image!
Recommended Products
As an Amazon Associate and member of other affiliate programs, I earn a small commission if you purchase something I recommend. I would never recommend products I don't love and use!
-
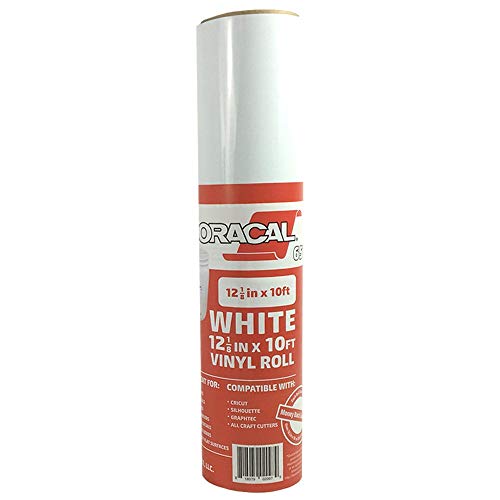 Oracal 651 Rolls of Vinyl for Cricut, Silhouette, Cameo, Craft Cutters, Printers, and Decals - Gloss Finish - Outdoor and Permanent (12.125" x 10ft, White)
 -
 Craftopia Transfer Tape 12x12 Clear Vinyl Tape roll with Blue Alignment Grid Application Tape, Perfect for cricut Cameo Silhouette self Adhesive oracal for Signs Crafts Decals Medium tack
 -
 Apple Barrel Acrylic Paint in Assorted Colors (16 Ounce), 21148 Black
When you make vinyl stickers for your Halloween pumpkin please share them with me! I’d love to see them! Tag me on Instagram (@handmadeintheheartland) or facebook!