Making polymer clay earrings is so fun and easy. I love this craft because it takes a relatively short amount of time to make quite a few earrings.
In this post I’ll give you all the tips and tricks I’ve learned as well as the best supplies to purchase to make polymer clay earrings. This post contains affiliate links, which means I make a small commission if you purchase something I recommend.


A few months ago I fell into the rabbit hole of figuring out how to make polymer clay earrings. I’ve watched you tube videos and read a lot of different articles. I’ve purchased my fair share of supplies and I’m excited to share all the things I’ve learned with you.
Why Make Polymer Clay Earrings?
These might be my new favorite craft. First of all they don’t take a long time, so you get instant crafting satisfaction! I also love that they are the perfect handmade gift.
With just a little bit of practice you can make them look really nice and they make amazing gifts. I love having a little stash of them in my craft room that I can use as a hostess gift, thank you gift or birthday present.

Supplies for Polymer Clay Earrings
Here is a list of my favorite supplies for making polymer clay earrings. You can easily find many of these supplies at your local craft store if not exactly the same they should have similar.
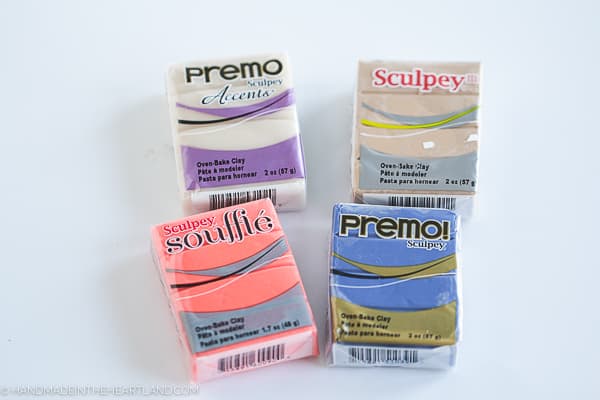
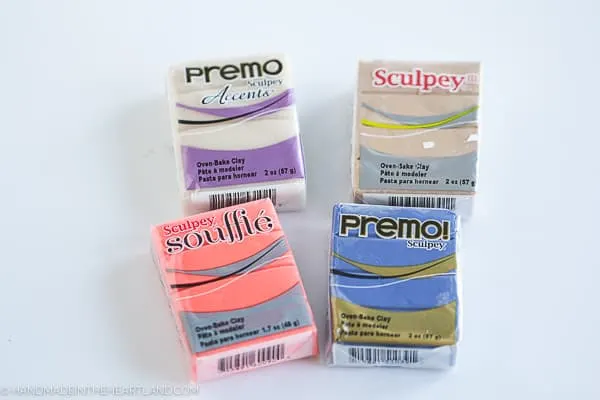
- Polymer clay. I really love Sculpey Souffle, it’s soft and pliable and has great color options. I’ve tried quite a few brands of clay and I always come back to Sculpey.
- Clay rolling pin and board set
- Clay roller/press
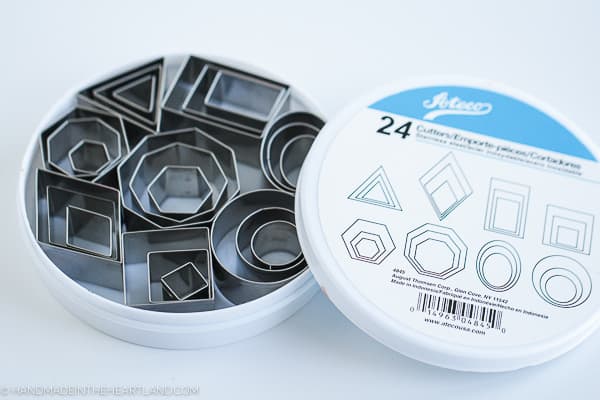
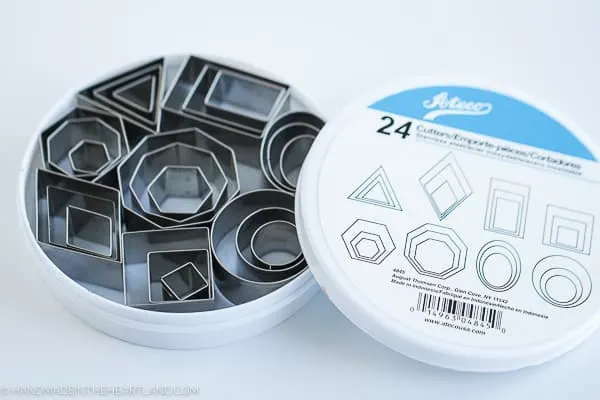
- Clay shape cutters
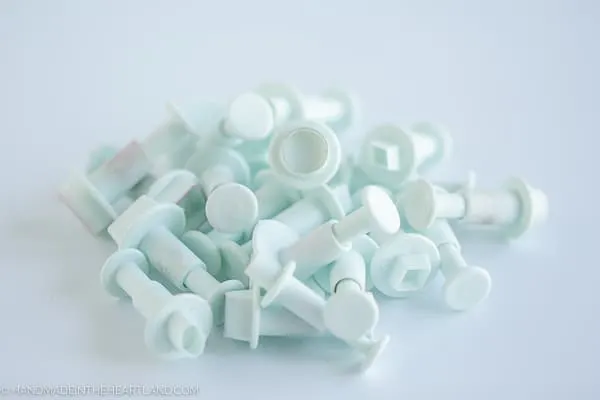
- Small shape plunger cutters
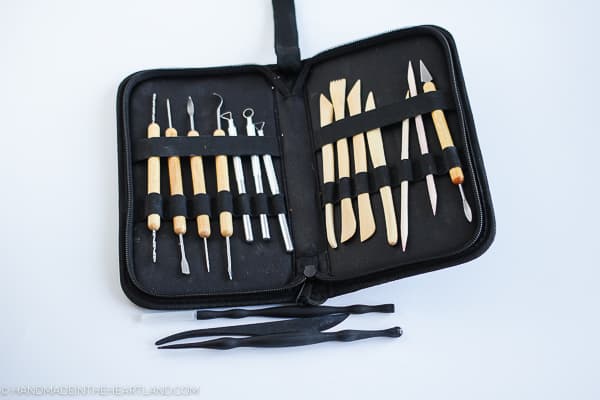
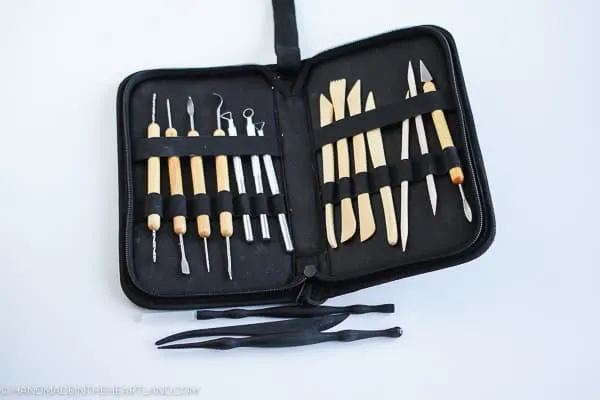
- Clay tools
- Larger clay tool set
- Jewelry pliers
- Gold jump rings
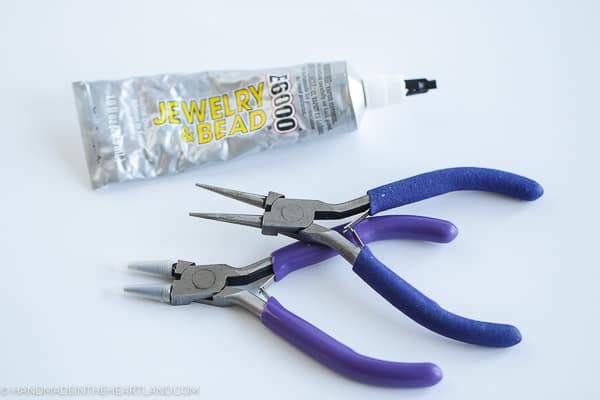
- Jewelry glue
- Gold earring posts & backs
- Earring display cards
- Earring boxes
Other items you’ll want to have on hand:
- rubbing alcohol
- paper towels
- cookie sheet
- parchment paper
Once you gather these clay making supplies you might be interested in making more projects! After you make polymer clay earrings check out my tutorials for a gold painted Polymer Clay Sand Dollar Necklace, DIY Polymer Clay Beads, and DIY Polymer Clay State Pendant Necklace.
How to Make Polymer Clay Earrings
Polymer clay earrings are fairly simple to make. The process takes some practice and perfecting but it’s something anyone can master. Here are step by step instructions for making polymer clay earrings.
Prep your surface
When rolling and cutting the clay you’ll want a hard flat surface, I like the acrylic plastic boards that came with the rolling pin set. I also like to roll out on parchment paper. So if I’m using a rolling pin I’ll put a small piece of parchment paper on top of the acrylic board and then roll the clay out on it, if I’m using the pasta maker I’ll roll the piece out and then place it on the parchment topped board for cutting out.
Step 1: Warm up the clay
Polymer clay has to be warmed up in your hands when you take it out of the package to revitalize the clay.
TIP: Make sure your hands are clean and keep a paper towel and alcohol or baby wipes close by. You’ll also want to make sure you wash your hands when you change colors. Work the clay in your hands until it is pliable enough to roll out.
Step 2: Roll out the clay
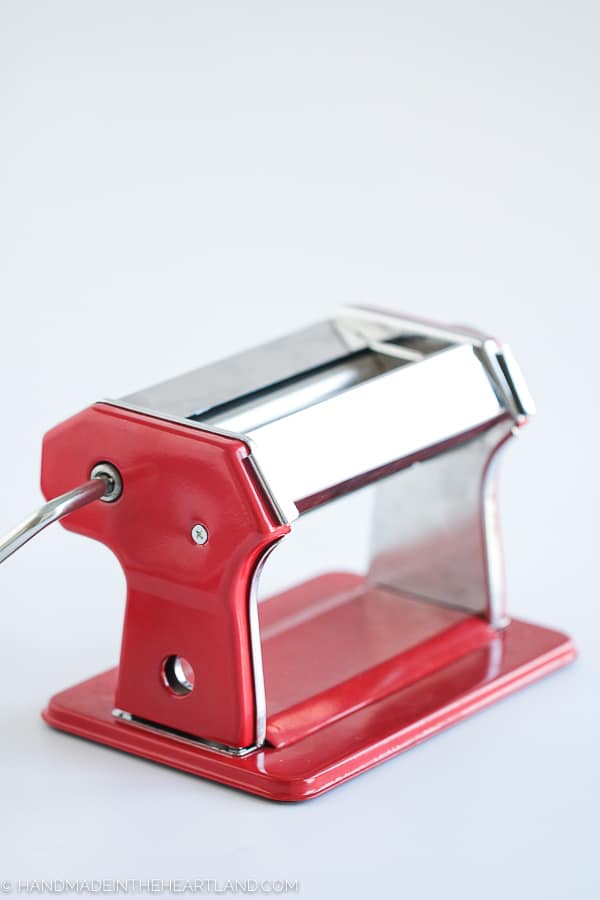
There are multiple ways you can roll out the clay. I first purchased a simple clay kit with a rolling pin which works. After making several batches of earrings and watching videos of people using pasta rollers or clay rollers I found someone on facebook marketplace selling a pasta maker so I purchased it.
I really like it because it makes the clay the same thickness throughout which is hard to do with a rolling pin. A friend of mine who sells her clay earrings purchased a roller specifically for clay that works great!

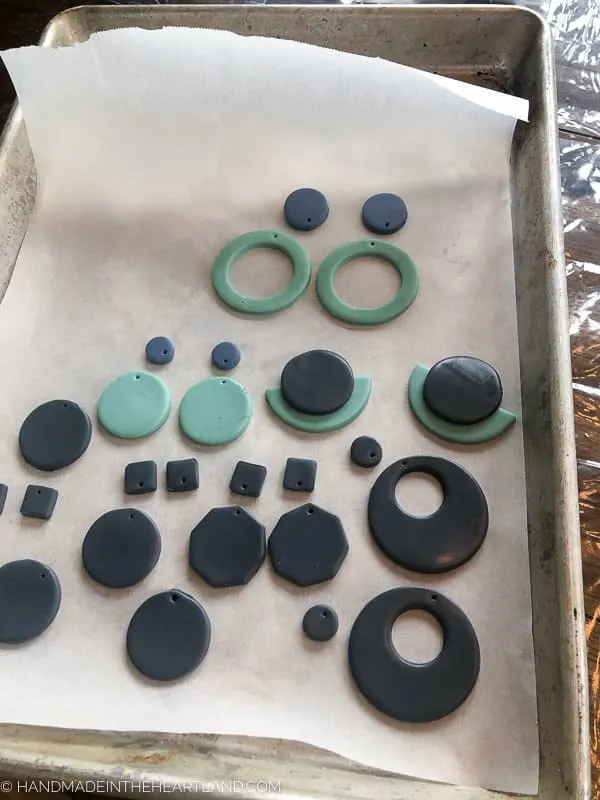
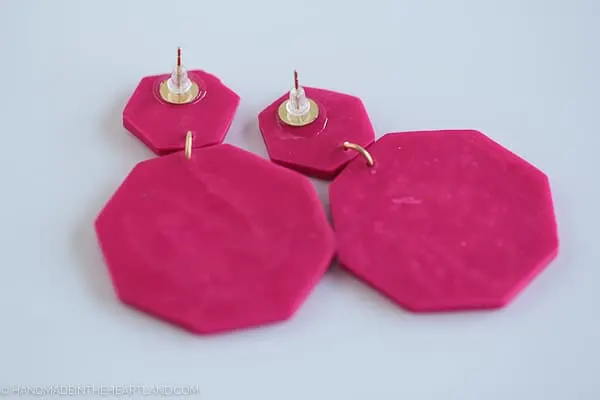
Step 3: Cut out clay shapes
This is the fun creative part! I have several different clay cutter sets, similar to cookie cutters but smaller. Some basic shapes are all you need.
I have two sets of cutters I really love: the Ateco metal set and a set of spring loaded cutters for small shapes. The spring loaded cutters are made for fondant but they work great for clay.
One of the tricky parts of working with polymer clay is trying hard not to get your fingerprints on the clay as you push it out of the cutter which can sometimes prove difficult, the spring loaded plunger style cutters pop the clay right out which is so nice.

Before I start working on a new batch of earrings I get inspiration from all the awesome makers that have posted online. I have a Pinterest board just for clay earrings! Check it out HERE.
Step 4: Make holes in clay for jewelry findings
After you cut the shapes you need to use a clay tool to poke holes where you will be placing jump rings. For instance if you are making studs you don’t need any holes but if you would like to have a lower piece and an upper piece you’ll need a hole on each piece to be able to join them with a jump ring.
Up until recently I always used a tool to poke holes in the clay before it was baked, however I started using a Dremel to drill the holes in after the clay is baked and I LOVE the clean result. If you have a Dremel or want to get serious about making earrings it is definitely worth it to get one.
Step 5: Bake the clay
Once you have cut the shapes and poked the holes place the clay on parchment paper and a cookie sheet. If you are cutting on parchment paper already you can just pick up the paper and move it to a baking sheet so you don’t have to touch the clay again.
I always try to minimize the amount of times I touch the clay! Bake the clay according to the package directions. Different brands require different temperatures and times so pay attention to the clay you are using, this is also a good reason to use the same brand in each batch you make.

Step 6: Finishing with jewelry findings and earring backs
After the clay comes out of the oven you’ll want to let them cool for a few minutes and then you can put the earrings together, the last step! Most of the time I use simple jump rings to put two pieces together and then post earring backs that I glue on with jewelry glue.
Jump rings are an easy connector, all you need is some jewelry pliers to bend the rings open and back closed after you have put the clay pieces through the ring. If you are new to jewelry making check out this article that shows you how to open and close jump rings.

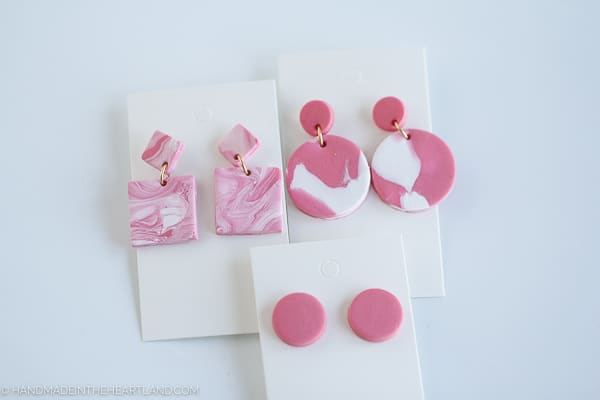
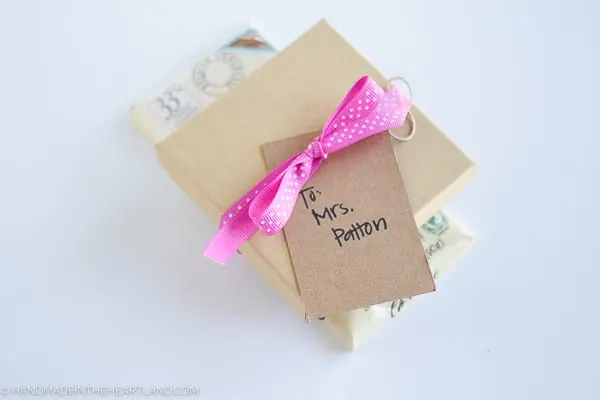
After I’ve finished making earrings I like to put them on earring cards to keep them in pairs. I’ve also purchased boxes to gift them in. As you can see in the picture below they make great teacher’s gifts! I put them with a chocolate bar for the kids teachers for Valentine’s day.
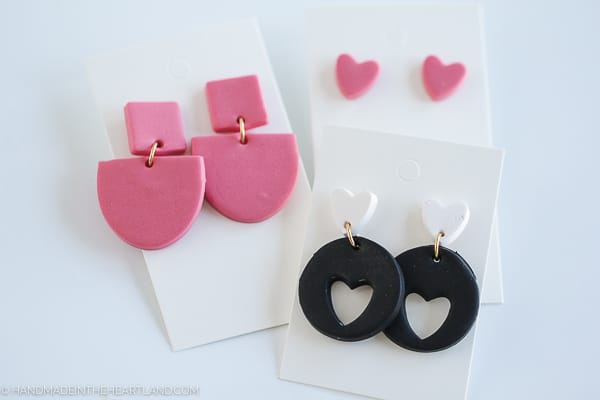


There are ENDLESS options for making polymer clay earrings. If you can’t find a color you want you can mix clays together to make a new color. You can add other jewelry findings like metal pieces to mix with the clay which can look really cool.
I’d love to see the earrings you make tag me on Instagram (@handmadeintheheartland) or facebook!
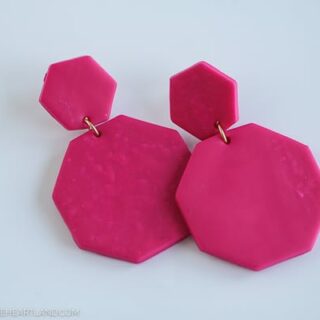
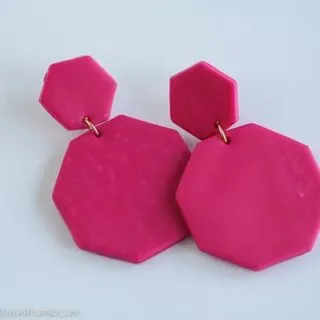
Polymer Clay Earrings
Polymer clay earrings are fun to make! Perfect for gifting and selling and with endless options for design this craft is such a great one to have up your sleeve!
Materials
- Polymer clay
- Clay rolling pin and board set
- Clay roller/press
- Clay shape cutters
- Small shape plunger cutters
- Clay tools
- Larger clay tool set
- Jewelry pliers
- Gold jump rings
- Jewelry glue
- Gold earring posts & backs
- Earring display cards
- Earring boxes
- rubbing alcohol
- paper towels
- cookie sheet
- parchment paper
Instructions
- Prep a hard flat surface to work on like an acrylic board and place a piece of parchment paper on it.
- Warm up the clay by rolling it in your hands. Make sure your hands are clean. Work the clay in your hands until it is pliable enough to roll out.
- Roll out the clay using a rolling pin or a clay press/roller.
- Cut out desired shapes with extra small cookie/clay cutters.
- Use a clay tool to poke holes where you will be placing jump rings.
- Bake clay according to package directions, let cool when done for a few minutes before finishing.
- Finish with jewelry findings. Use simple jump rings to put two pieces together and then glue post earring backs on with jewelry glue. Let the glue dry and they are ready to wear or gift!
Recommended Products
As an Amazon Associate and member of other affiliate programs, I earn a small commission if you purchase something I recommend. I would never recommend products I don't love and use!


If you’re coming over from google stories, thanks for stopping by! 🙂
25 DIY Clay Earrings Ideas For Everyone - DIYS Craftsy
Friday 2nd of September 2022
[…] handmadeintheheartland […]
Make your own clay earrings - Jewelry Directory
Wednesday 19th of January 2022
[…] How to Make Polymer Clay Earrings – Handmade in the Heartland […]
DIY Succulent Spring Wreath | Handmade in the Heartland
Monday 15th of February 2021
[…] want to check out these other fun craft projects: DIY Ceramic Tile Coasters with Vinyl Lettering, How to Make Polymer Clay Earrings, and How to Cut Paper Peony’s with […]
DIY Polymer Clay Sand Dollar Necklace | Handmade in the Heartland
Friday 5th of February 2021
[…] supplies you should definitely try your hand at other projects. Make sure to check out my posts on how to make polymer clay earrings, DIY polymer clay beads and DIY polymer clay state pendant […]
51+ Crafts That Make Money-Most Profitable Crafts To Sell In 2021
Tuesday 29th of December 2020
[…] These polymer clay earrings are so fun and easy DIY craft items. Plus you can make quite a few earrings in a short amount of time. […]