Learn how to make pizza dough with this simple 5 ingredient recipe. This step by step tutorial gives you all the tips and tricks you need to know to make homemade pizza dough.
This recipe includes affiliate links which means I make a small commission if you purchase something I recommend.

Fresh pizza dough is the foundation for great pizza. It’s a lot easier to make than you might think, it just takes a bit of time. Do me a favor and never again buy those pre-made packaged dough circles in the grocery store aisle next to the pizza sauce. 😉
Ingredients for Pizza Dough
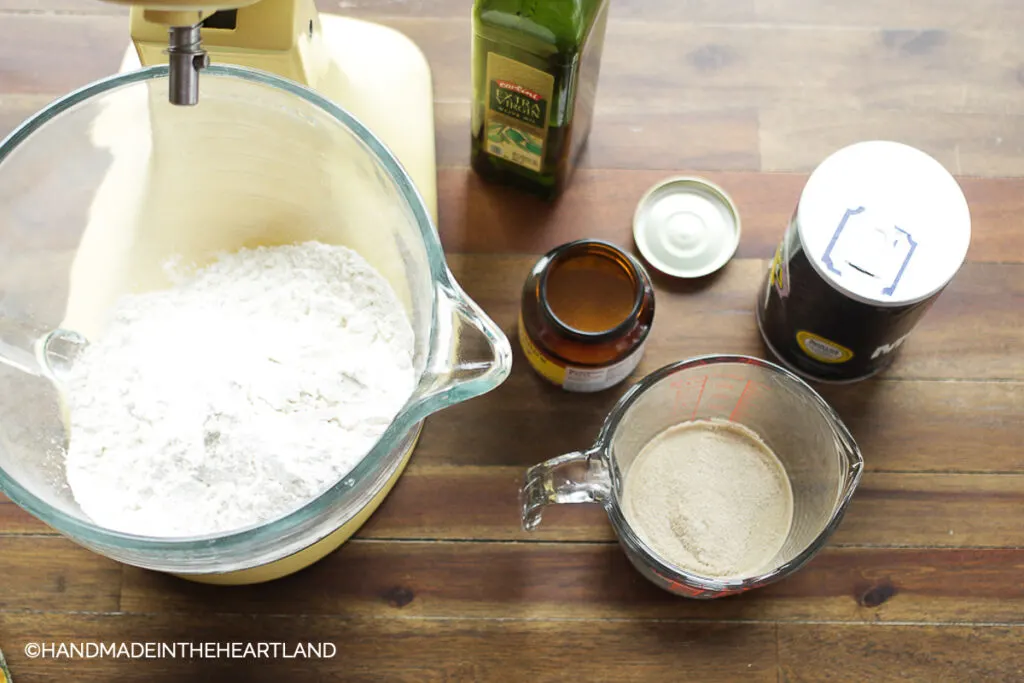
My homemade pizza dough recipe is so simple and only calls for a few ingredients. Pizza dough is a lean bread dough meaning it is low in fat and sugar to produce a crispy on the outside, soft on the inside crust. A little olive oil is added for flavor.
- Water- Tap water is fine, however if you know you have extremely hard or soft water you could use bottled water to be on the safe side. Water elements can effect the rise of the dough.
- Active Dry Yeast- In this recipe I use the most common yeast- active dry yeast which has to be dissolved in warm water to activate it. If you only have instant yeast on hand you can skip the dissolving step and add it directly into the mixer with the other ingredients. The rise will probably take less time as well.
- Bread Flour- you don’t have to use bread flour, all-purpose works but bread flour produces a little bit better results.
- Salt– salt is necessary in pizza dough to help with flavor and it also helps strengthen the dough.
- Olive Oil– olive oil adds a small amount of fat, enhances flavor and also helps dough create a barrier that prevents sauce from seeping into the dough.
How to make whole wheat pizza dough
This recipe is super easy to turn into whole wheat pizza dough! Just use half bread flour and half whole wheat flour. It’s that simple. Whole wheat flour creates a denser pizza dough so it will be less fluffy but it still tastes delicious.

When glancing at this list of steps it may seem like a lot of information, it is, but it’s not a complicated or difficult process. Making pizza dough is a super easy dough to make and perfect for even a beginner baker or cook who isn’t familiar with bread making.
How to make Homemade Pizza Dough Step by Step:
Step 1:
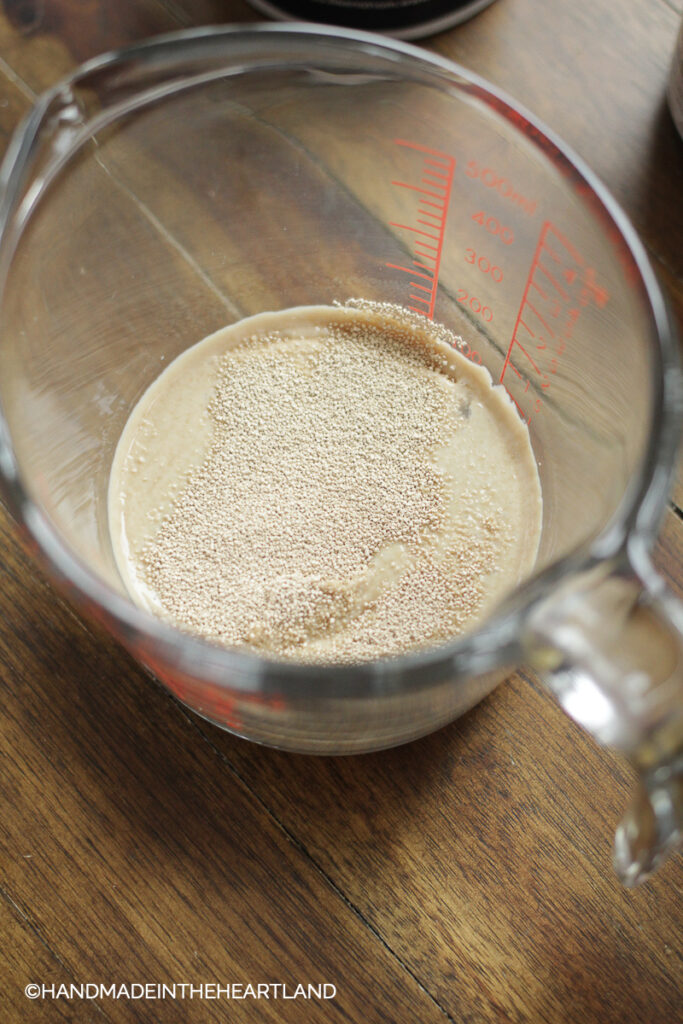
Activate the yeast. The first step is to dump the active dry yeast into warm water. To properly activate the yeast the water needs to be between 110°-115°, any hotter and it could kill it and any colder and it won’t activate.
If I let my tap water run at the hottest setting for a few minutes it usually gets to that temperature. If it’s not you can microwave the water for 30 second increments. It’s imperative to have a thermometer to be able to accurately see the temperature. I use a Thermo Pro Pen.
Let the yeast sit in the warm water for 5 minutes. It will dissolve and start to foam, that’s how you know it’s activated. There is lots of great information about yeast in this article about yeast & baking lessons by red star yeast.

Step 2:
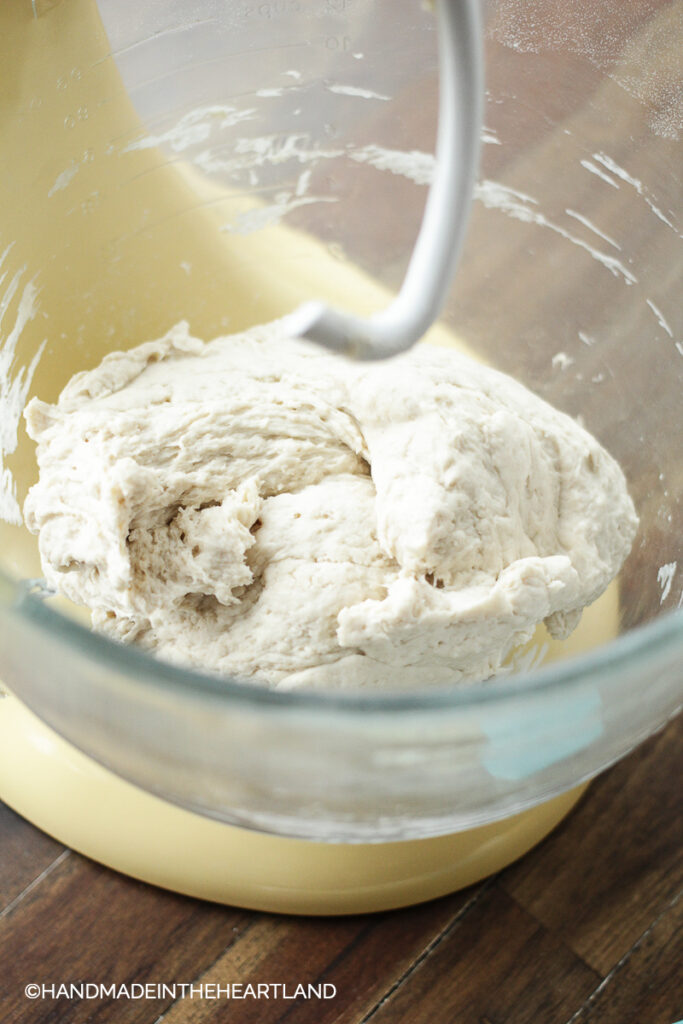
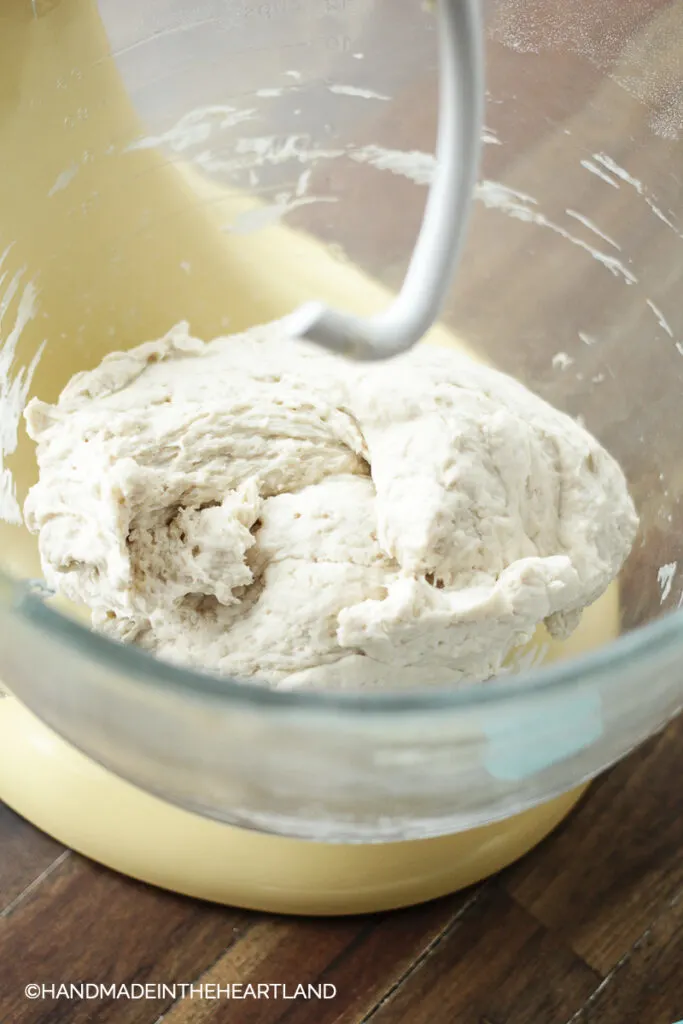
Add ingredients together to mix. I use my Kitchenaid mixer with the dough hook attachment to mix and knead the pizza dough. You will add the flour and salt together first, give it a little stir so the salt distributes and then pour in the yeast mixture, extra water and olive oil.
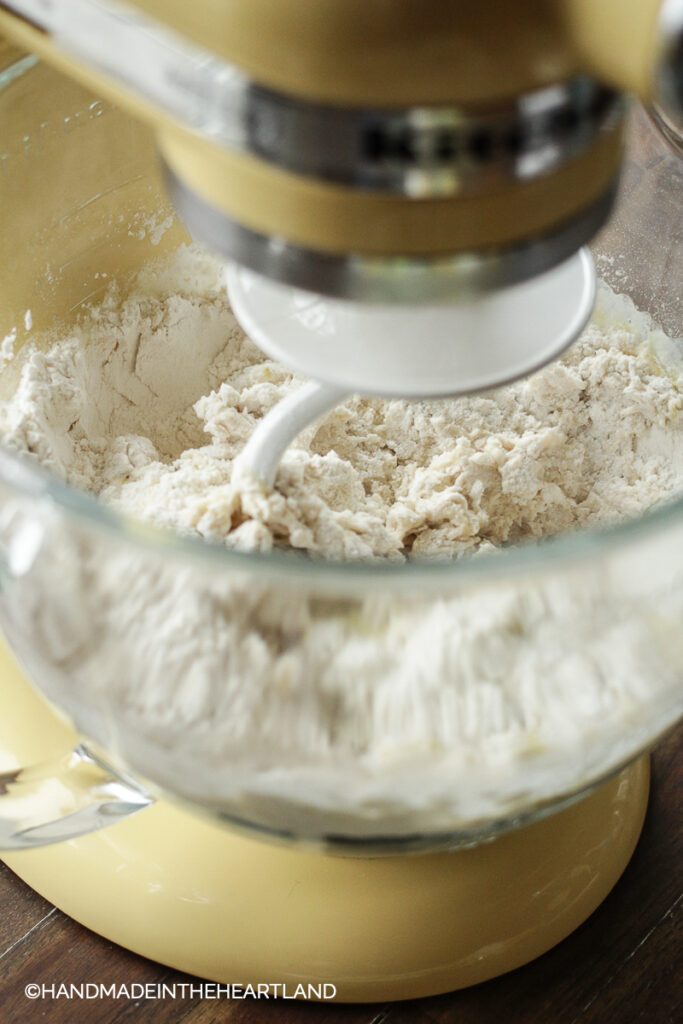

It takes several minutes for the dough to come together and I’ll usually take a spatula a few times and remove any dough stuck to the sides of the bowl.

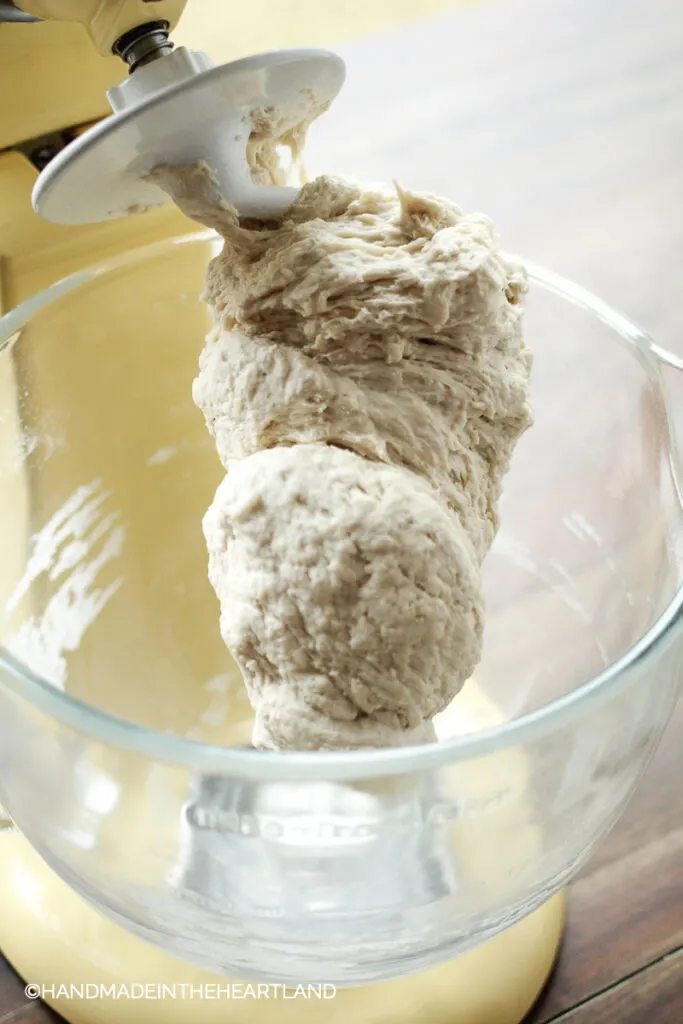
Keep mixing it until the dough has come together, around 5 minutes.
Step 3:
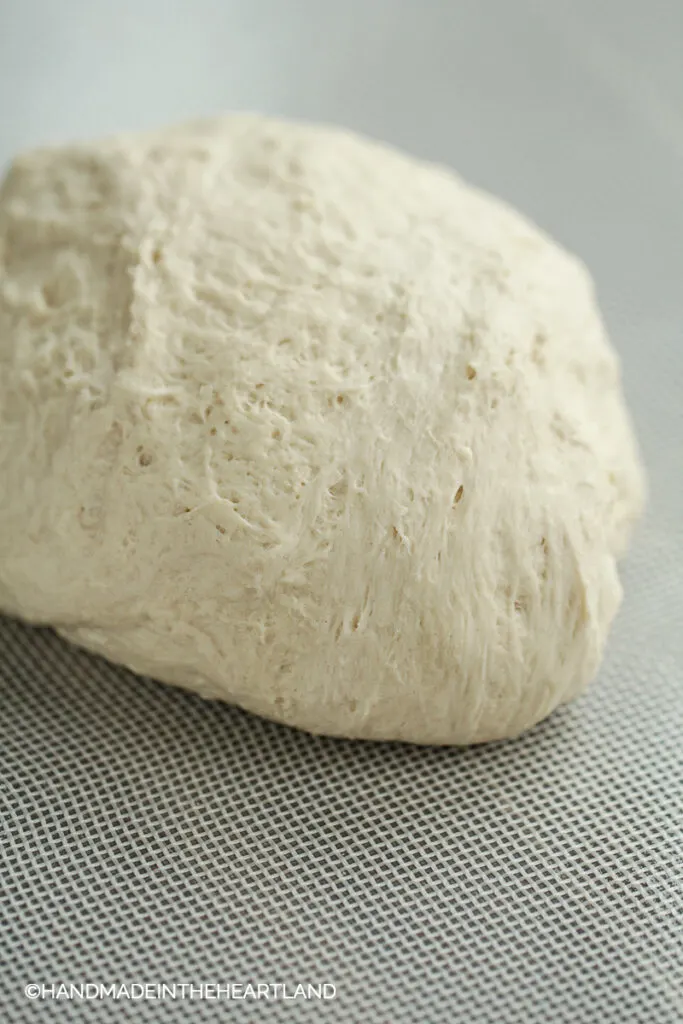
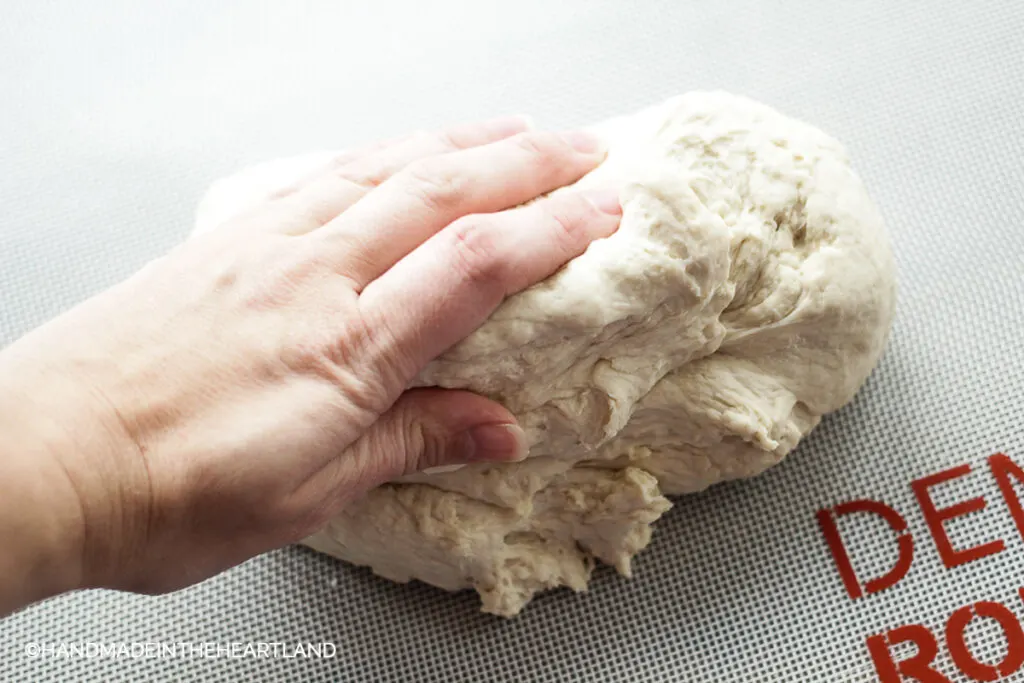
Knead by hand. Move the dough to a floured work surface or a nonstick rolling mat like a Roul’pat to knead the dough by hand a few times and form it into a ball.

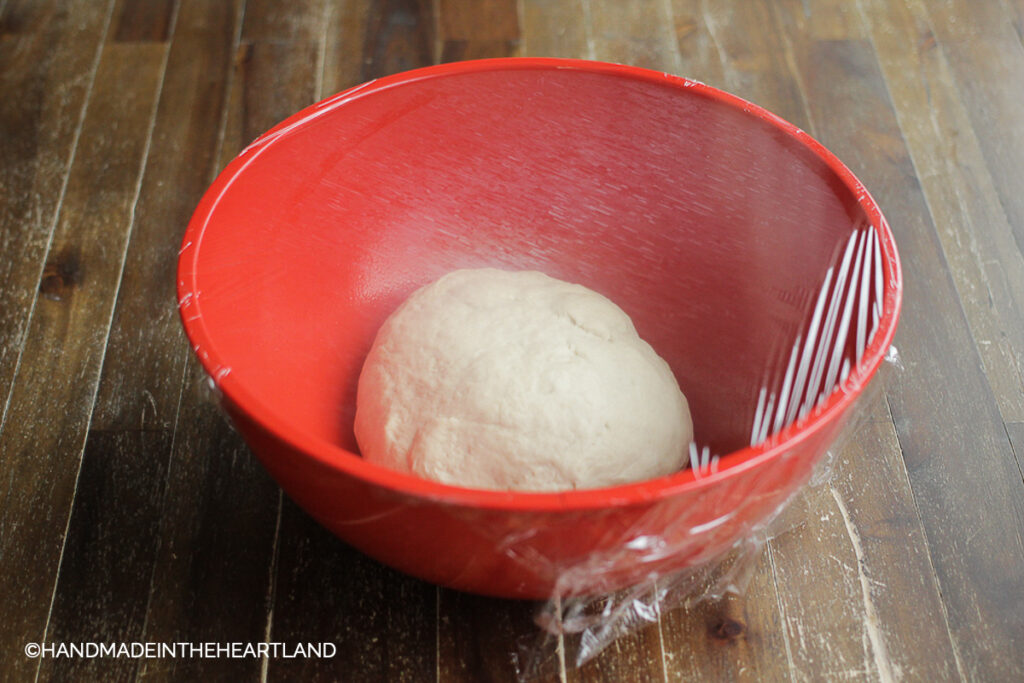
Step 4:
Move to an oiled bowl and cover. The easiest way I’ve found to oil a large bowl is to use cooking spray. You’ll need a very large bowl. After spraying the bowl place the dough ball in and cover with plastic wrap.

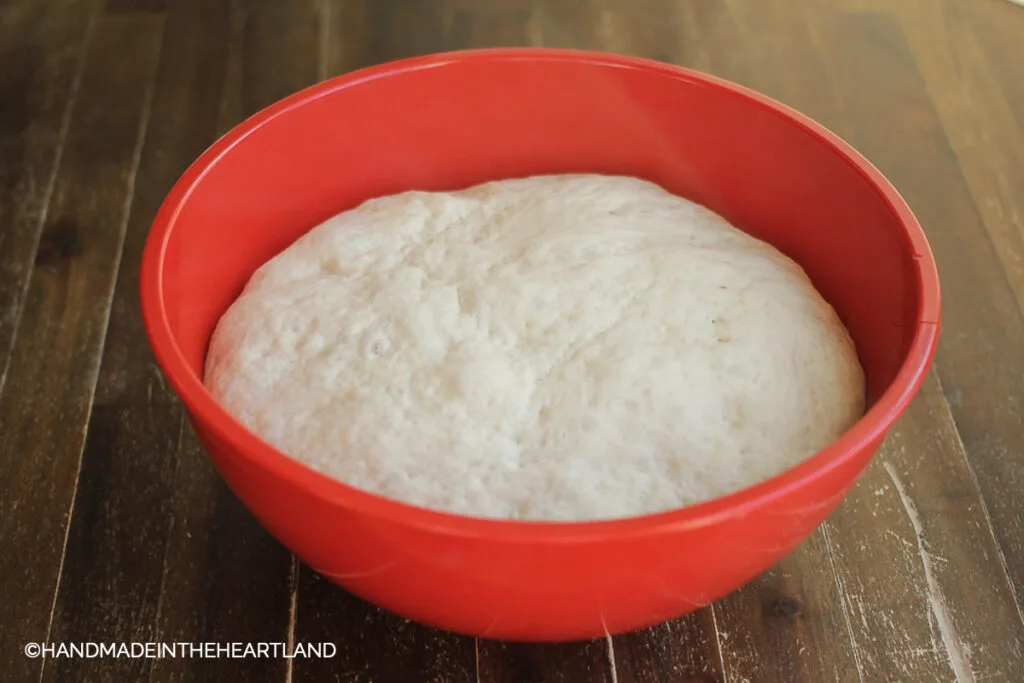
Step 5:
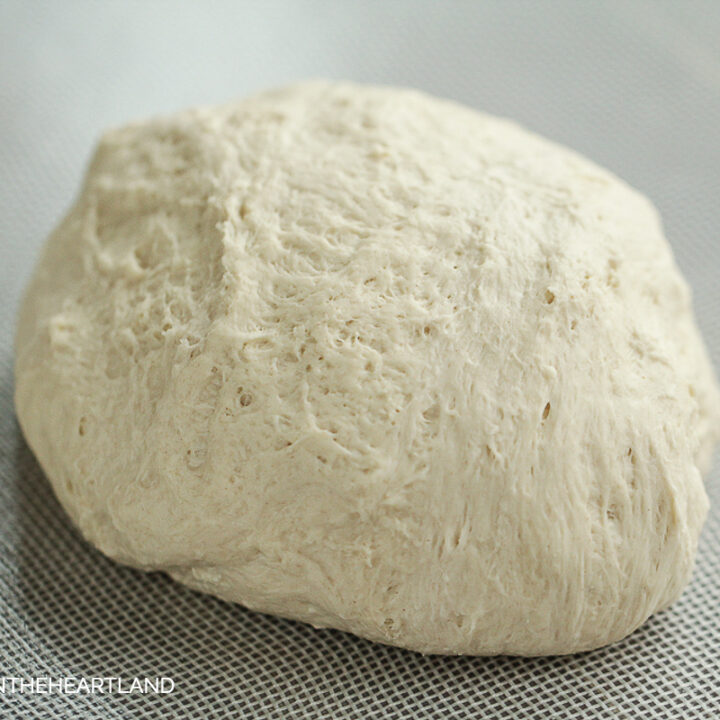
Let rise. After about 1 1/2 – 2 hours the dough should be doubled in size and ready for the next step.
What temperature does it need to be for pizza dough to rise?
Yeast likes a warm place to rise, ideally the temperature should be 80°. If your house is cooler than 75° you might see a slower rise. Find a warm place in your house to set the covered bowl.
You can always use a towel to cover the rising dough but I find that plastic wrap keeps the heat in and prevents a hard crust from forming on the top of the dough.

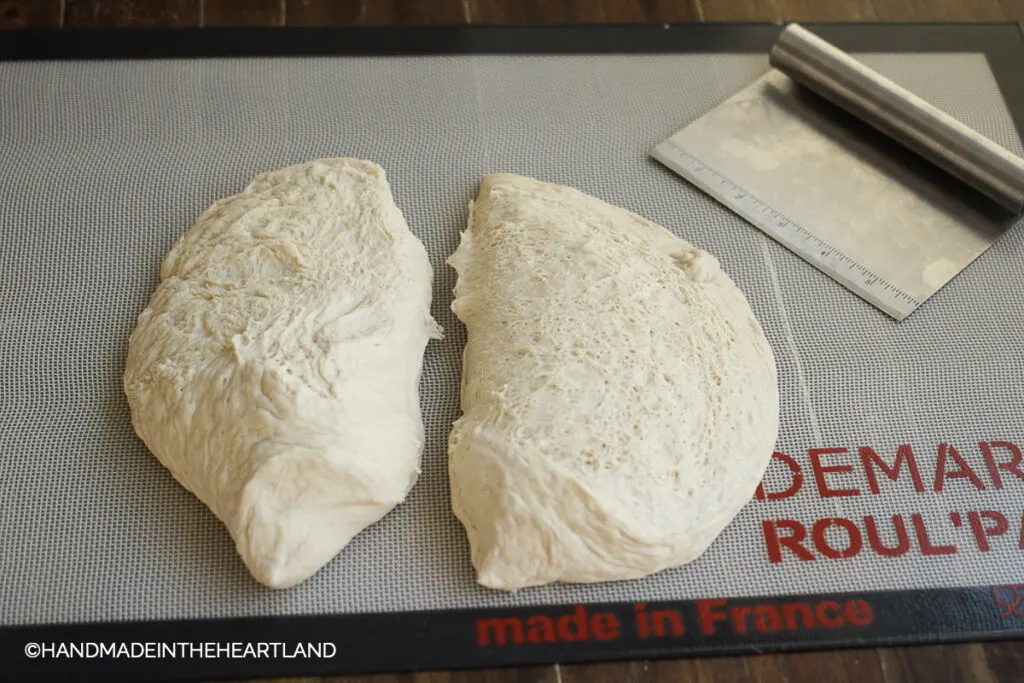
Step 6:
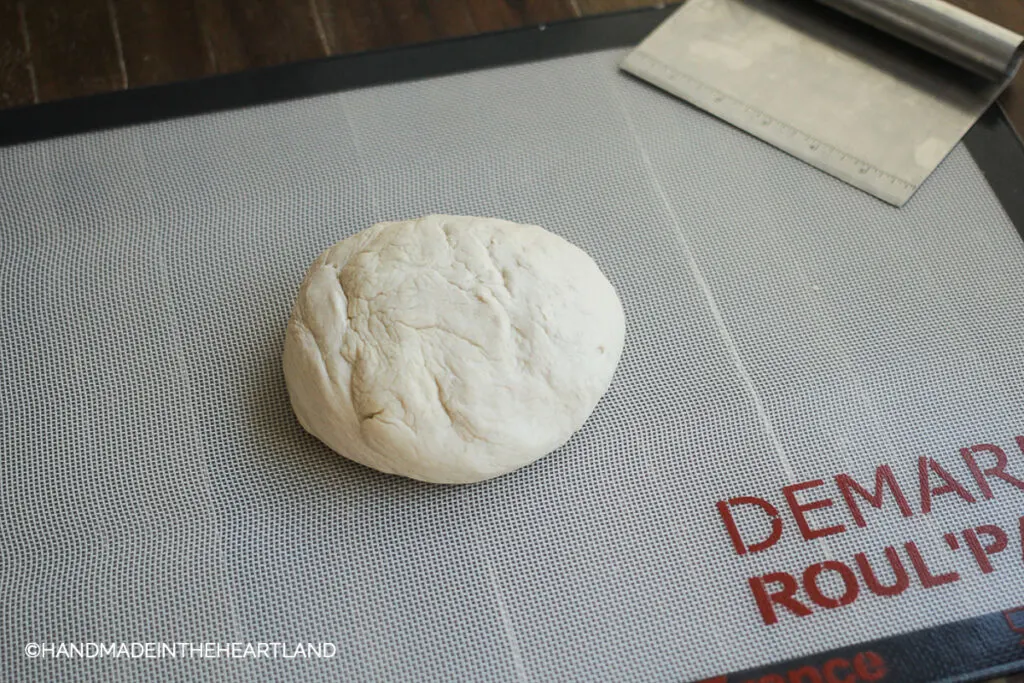
Turn, cut & form dough. Dump the dough out onto a floured work surface or a nonstick mat to cut the dough and shape it into a ball. Don’t overwork the dough in this step.
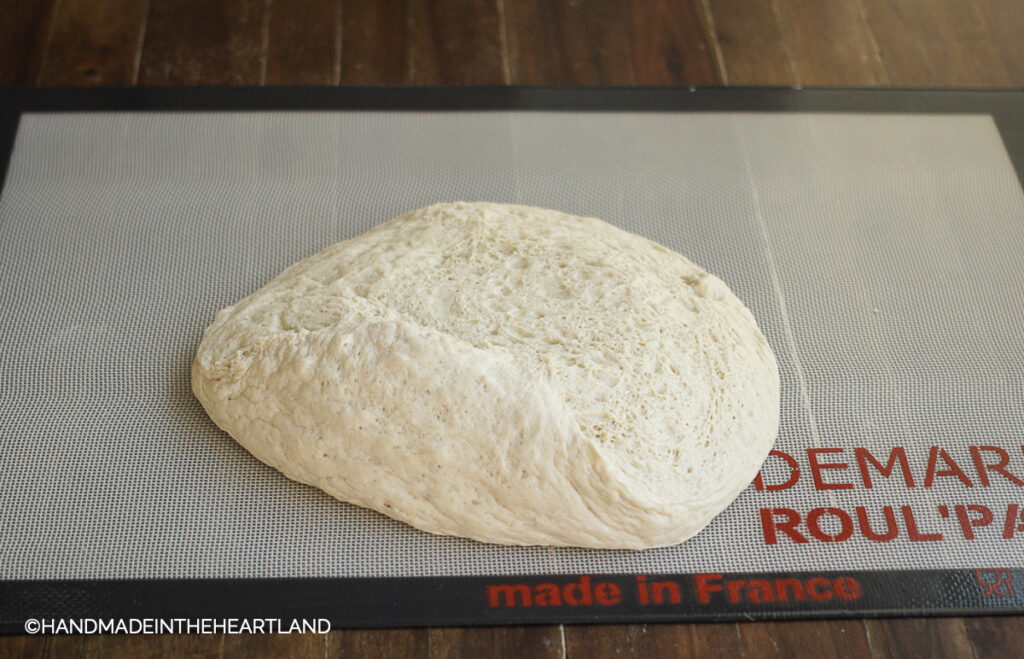
I like to use a metal pastry cutter to cut the dough in half. This recipe makes enough dough for 2 pizzas. After it’s divided shape each into a ball.

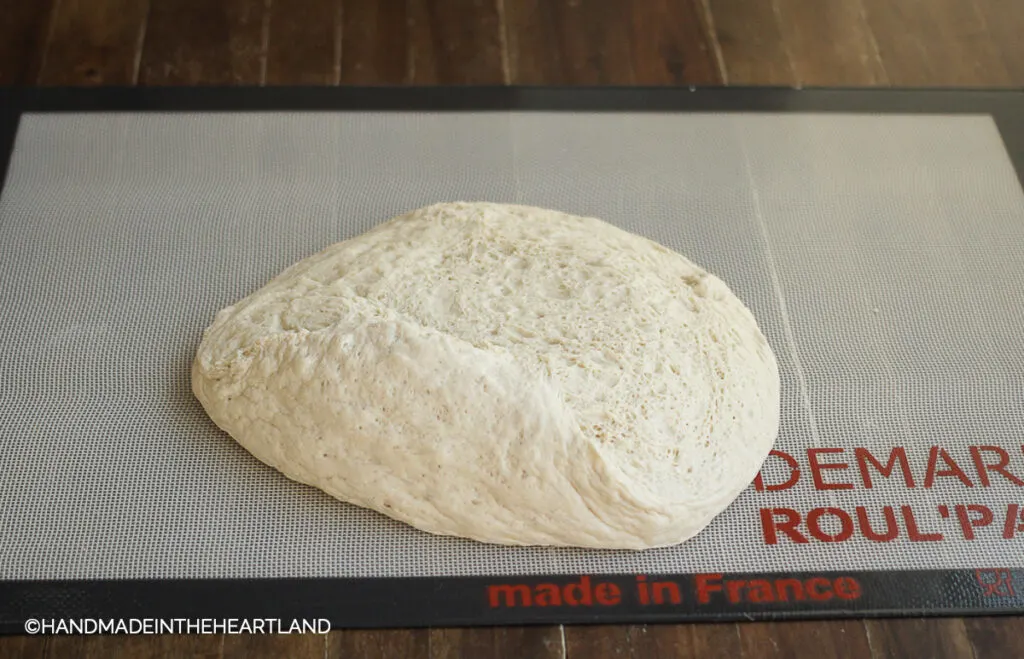
Step 7:
Let dough rest. Let the dough rest for 10 minutes, but no longer than 30 minutes.

Can you pre-make pizza dough?
Yes! If you want to do some meal prep in advance you can make the pizza dough ahead of time. This is the step where instead of letting it rest and then rolling out you would wrap it in plastic wrap and store it in the fridge for 1-2 days or in the freezer for 2 months.
Once you are ready to use the pre-made refrigerated pizza dough you’ll need to remove it from the fridge an hour before you’re ready to make the pizza so it can fully come to room temperature and be ready to roll out.
Can you freeze pizza dough?
Yes! After step 6 wrap the dough in plastic wrap, maybe a double layer to keep it extra free from freezer burn, and then place it in a gallon size ziplock freezer bag. Make sure to write a date on the bag of when it was made.
Once you are ready to use the pre-made frozen pizza dough you’ll need to remove it from the freezer and put it in the fridge around 24 hours before you want to use it. Then remove it from the fridge an hour before you’re ready to make the pizza so it can fully come to room temperature and be ready to roll out.
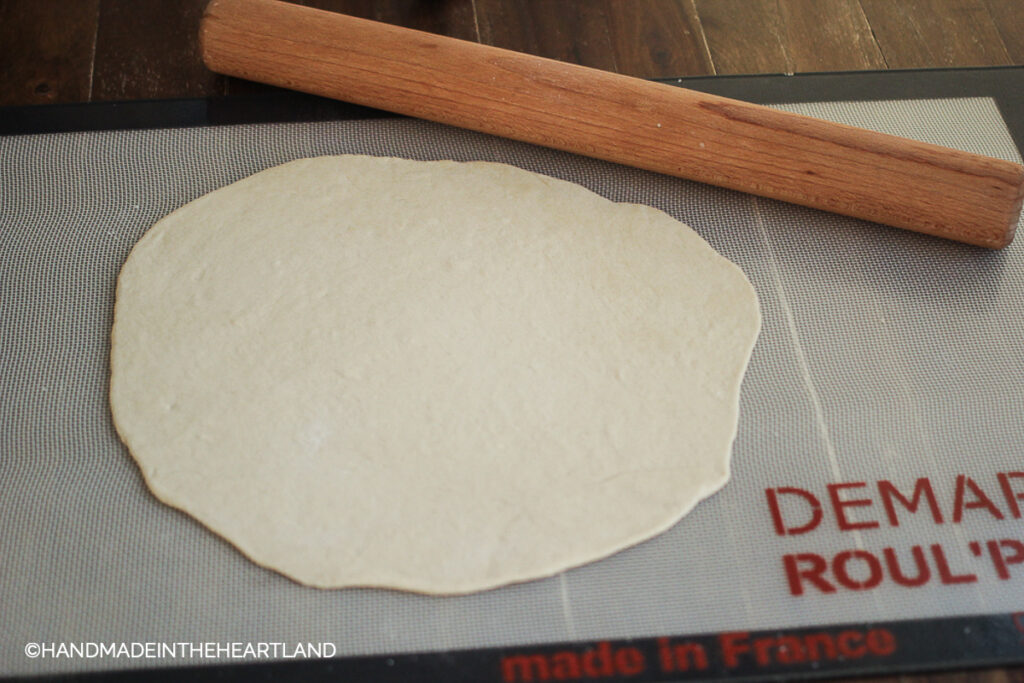
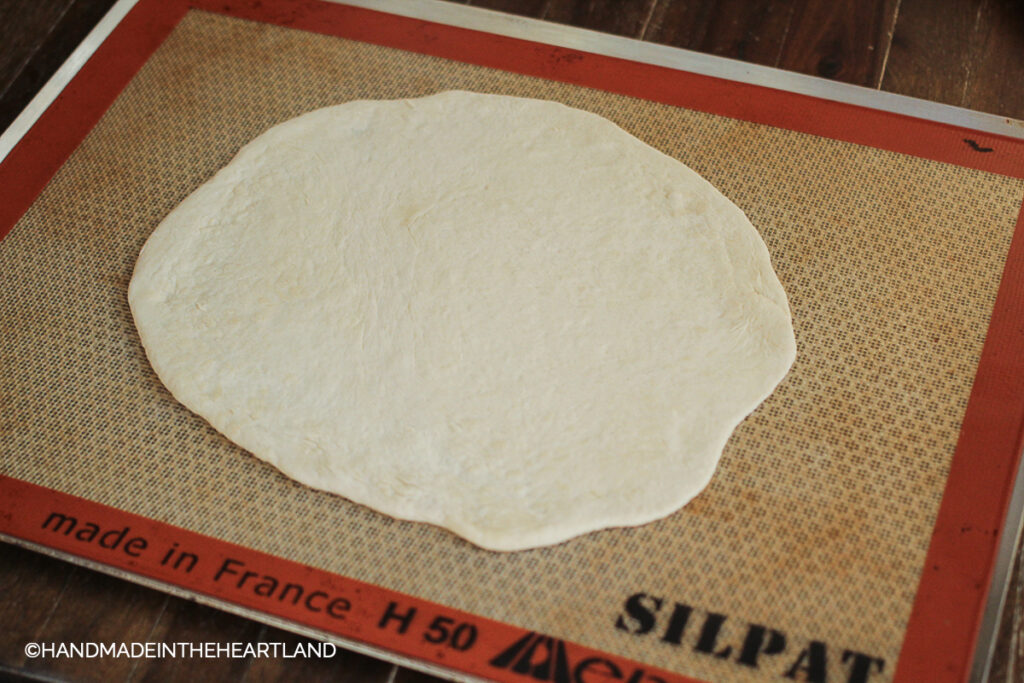
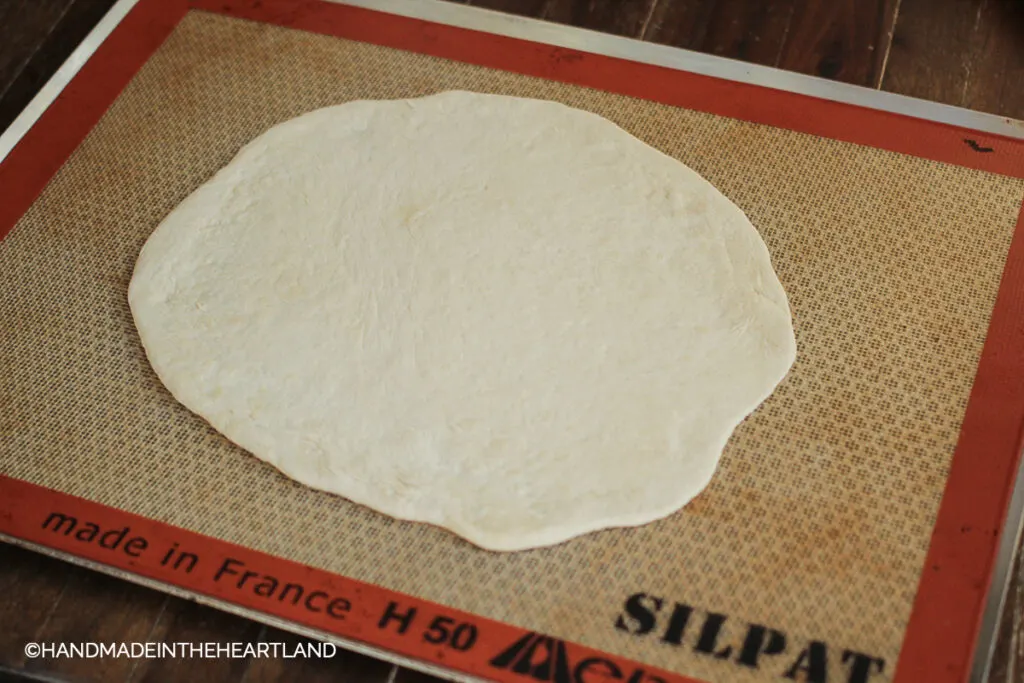
Step 8:
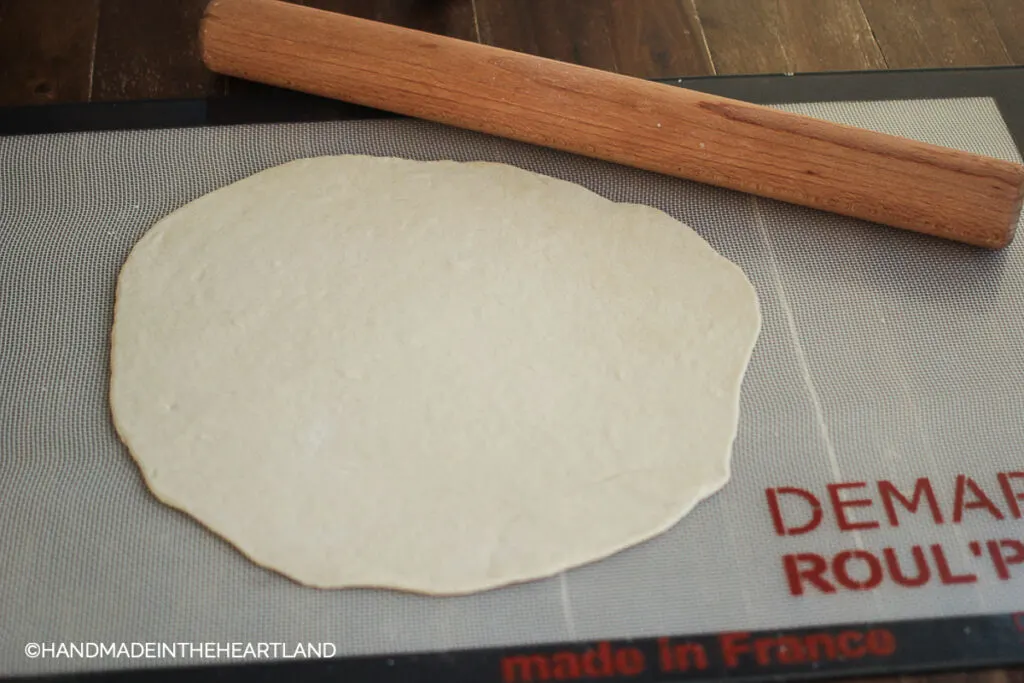
Roll out dough & move to baking surface. I’ve been making pizza dough weekly for years now and although I know that professionals pull and shape their dough by hand I find it so much easier to use a rolling pin.
How to roll out pizza dough with a rolling pin
If you are using a rolling pin to roll out pizza dough the key is to not overwork the dough. You don’t want all the air pushed out of the dough or the dough to be worked so much that it won’t rise in the oven.
I suggest pushing the dough down with your hands first and then as lightly as you can roll the dough into your desired circle or oval. You can always add a little bit of flour if your dough is sticking to your surface or rolling pin. You shouldn’t need more than a tablespoon or two of extra flour sprinkled over the dough.
Overworked dough that has all the air pushed out of it will give you a flat, tough texture after it is baked. That has only happened to me a handful of times so it’s not likely. Just try to be minimal with your shaping and you’re pizza dough will be light and fluffy on the inside.
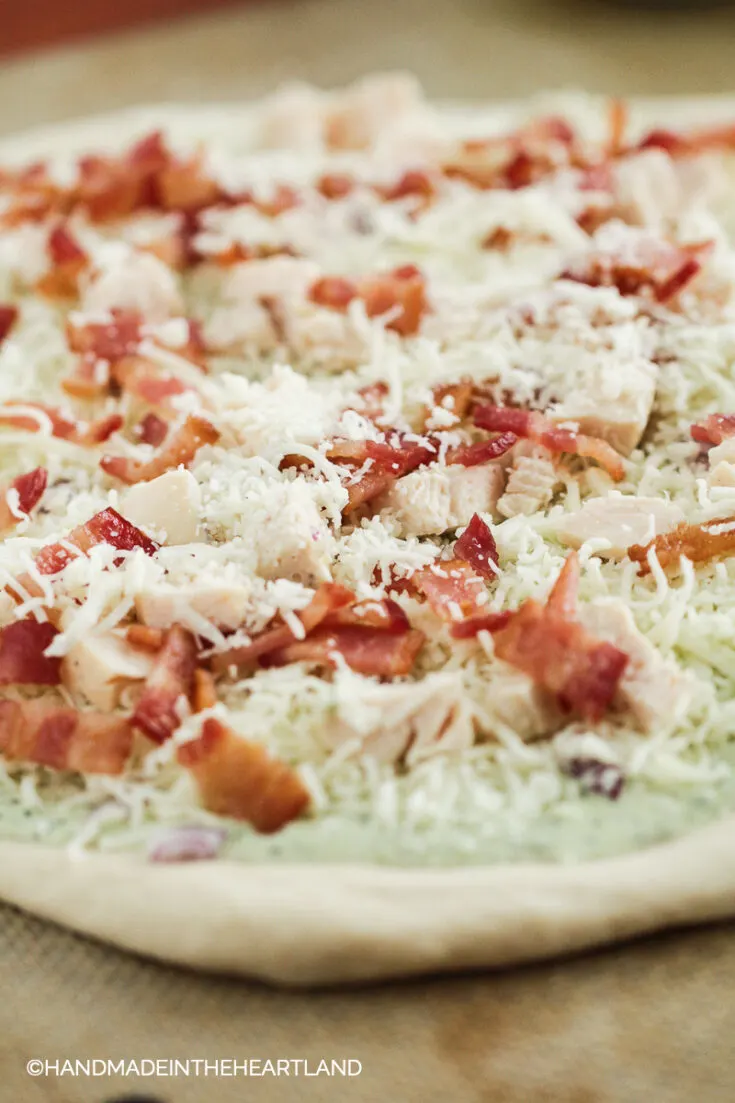
As I talk about in my post Homemade Pizza I bake my pizzas on a Silpat lined perforated baking sheet. This removes a cumbersome step of having to use a pizza peel and pizza stone, and I still have amazing pizza crust.
After I’m happy with the pizza shape I’ve made I’ll pick it up and move it to Silpat and then proceed with making the pizza.
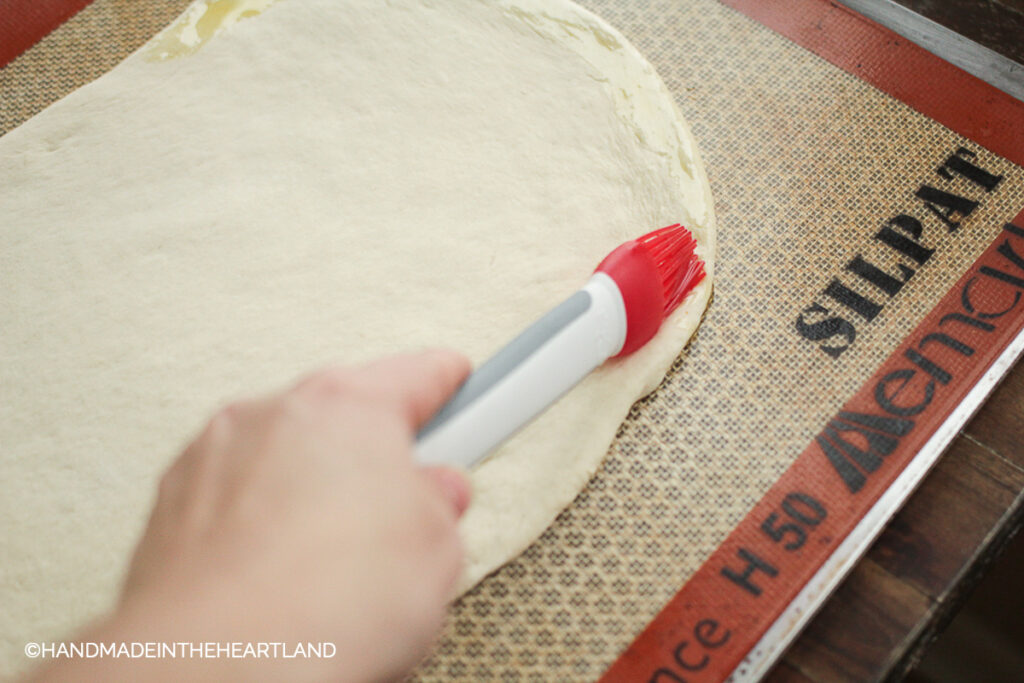
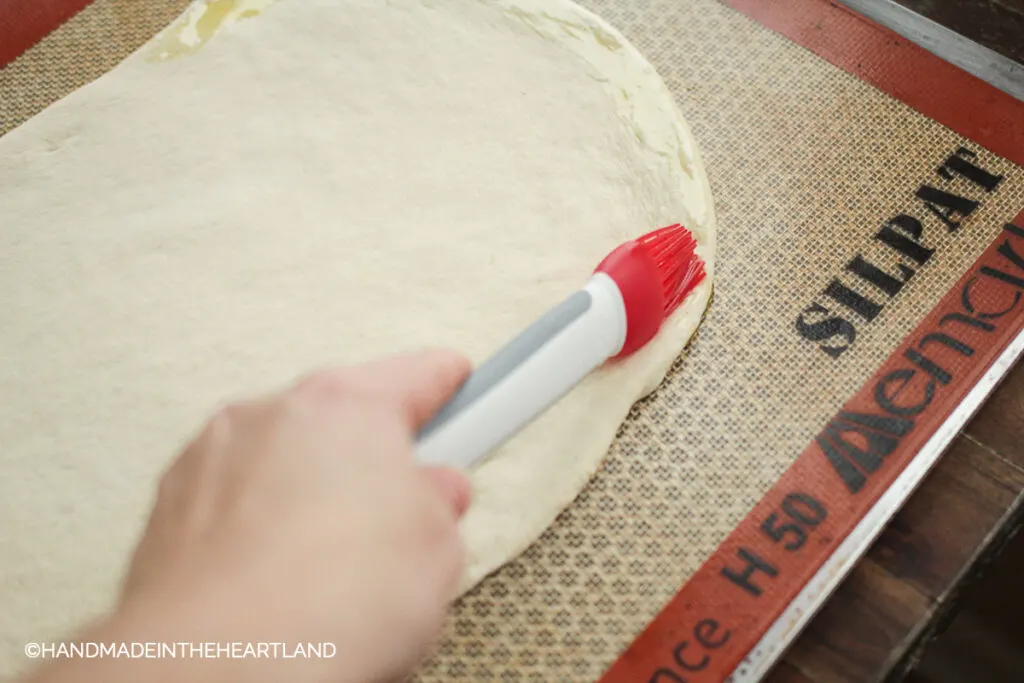
Step 9:
Brush edges with olive oil. Brushing the edges of the pizza dough with olive oil will help the dough fry in the oven and produce a crispy crust that we all love. The inside will still say soft and chewy but the outside will be crisp and brown. Perfect pizza crust!
My favorite homemade pizza recipes
Now that you know how to make the best pizza crust you’re going to want to make pizza every weekend, right?! Be sure to read my post with tips on making the perfect Homemade Pizza and How to cook pizza for a crowd.
Because I know we all get sick of the same old pepperoni and red sauce combo I have created some really delicious pizza recipes to share with you. I hope that these recipes will make family pizza night more delicious.
- Meat Lovers Pizza
- Caprese Pizza
- Tuscan Mushroom and Sun-dried Tomato Pizza
- Chicken Bacon Ranch Pizza
- Chicken Apple & Caramelized Onion Pizza
If you would like to get all 5 pizza recipes and the instructions for making pizza dough in a downloadable e-cookbook you can purchase my “How to Make Pizza at Home” ebook Here!
Tools for making homemade pizza
I don’t use a lot of fancy pizza making supplies that are used only for pizza. I don’t need extra stuff in my kitchen! So I prefer tools that are used for a variety of cooking needs. These are my tried and true cooking tools that I love to use for pizza making and more!
- Silpat– A nonstick no-mess surface that is perfect for making pizza. Read more about how I use it in my post: The Top 3 Reasons I Love My Silpat
- Perforated Baking Sheet– You need a base for the Silpat to sit on. You can use a sheet pan or jelly roll pan but I prefer the perforated baking sheet because it lets more air through the bottom and creates a crispier crust.
- Roul’Pat– I can’t imagine rolling out the pizza dough on any other surface. This non-stick mat is awesome. I also use it for sugar cookies, pie crust, bread dough and more.
- Metal Scraper– This tool is such a life saver when it comes to cutting and scraping dough.
- Pizza Slicer– the only tool that’s “specific” to pizza. 😉
- Offset Spatula– Although not necessary I really like to use an offset spatula to spread sauce on dough. If you already have one for icing cakes pull it out for pizza!
- Basting Brush– I use a basting brush to brush the olive oil onto the edges of the pizza dough crust.
- Kitchenaid Mixer with Dough Hook– Oh how do I count the ways I love my Kitchenaid mixer. I can’t imagine making pizza dough without a stand mixer, it makes it so easy. I clearly wasn’t cut out for pioneer days.
- Large Bowl– You’ll want an extra large bowl to let the dough rise in.
- Rolling Pin– A good rolling pin is a staple in the kitchen and you’ll need it to roll out your pizza dough.

Homemade Pizza Dough
Make homemade pizza taste delicious with this simple recipe for the best homemade pizza dough!
Ingredients
Pizza Dough
- 1⁄2 cup warm water
- 2 1⁄4 tsp. Active Dry Yeast , 1 package
- 4 cups (22 oz.) Bread flour, plus more for dusting
- 1 1⁄2 tsp. Salt
- 1 1⁄4 cup water, at room temperature
- 2 tbsp. extra-virgin olive oil
Instructions
Notes
To make whole wheat flour use 1/2 bread flour and 1/2 whole wheat flour.
Recommended Products
As an Amazon Associate and member of other affiliate programs, I earn a small commission if you purchase something I recommend. I would never recommend products I don't love and use!


Nutrition Information:
Yield: 16 Serving Size: 1Amount Per Serving: Calories: 131Total Fat: 2gSaturated Fat: 0gTrans Fat: 0gUnsaturated Fat: 2gCholesterol: 0mgSodium: 220mgCarbohydrates: 24gFiber: 1gSugar: 0gProtein: 3g
If you would like to get all 5 pizza recipes and the instructions for making pizza dough in a downloadable e-cookbook you can purchase my “How to Make Pizza at Home” ebook Here!
Pizza Recipes
All our favorite pizza recipes! Get excited about homemade pizza night!

This homemade pizza recipe is a standard in our house! We eat pizza every Friday and this customizable recipe gives you all the tips and tricks to make perfect pizza at home!
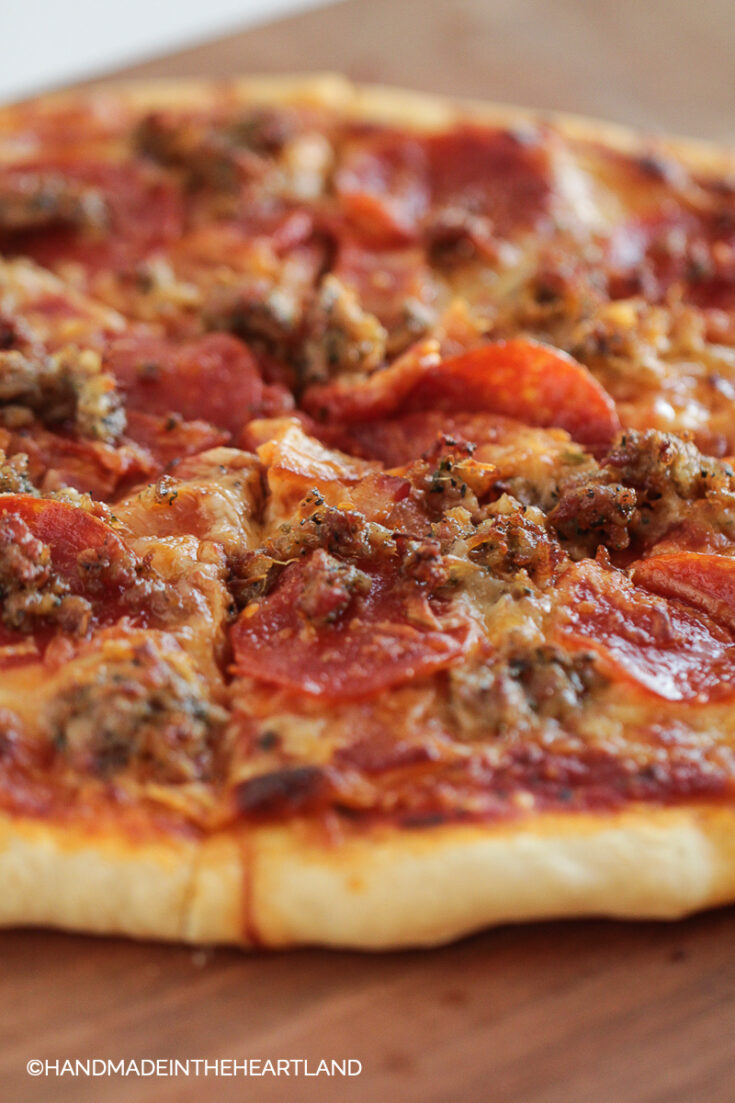
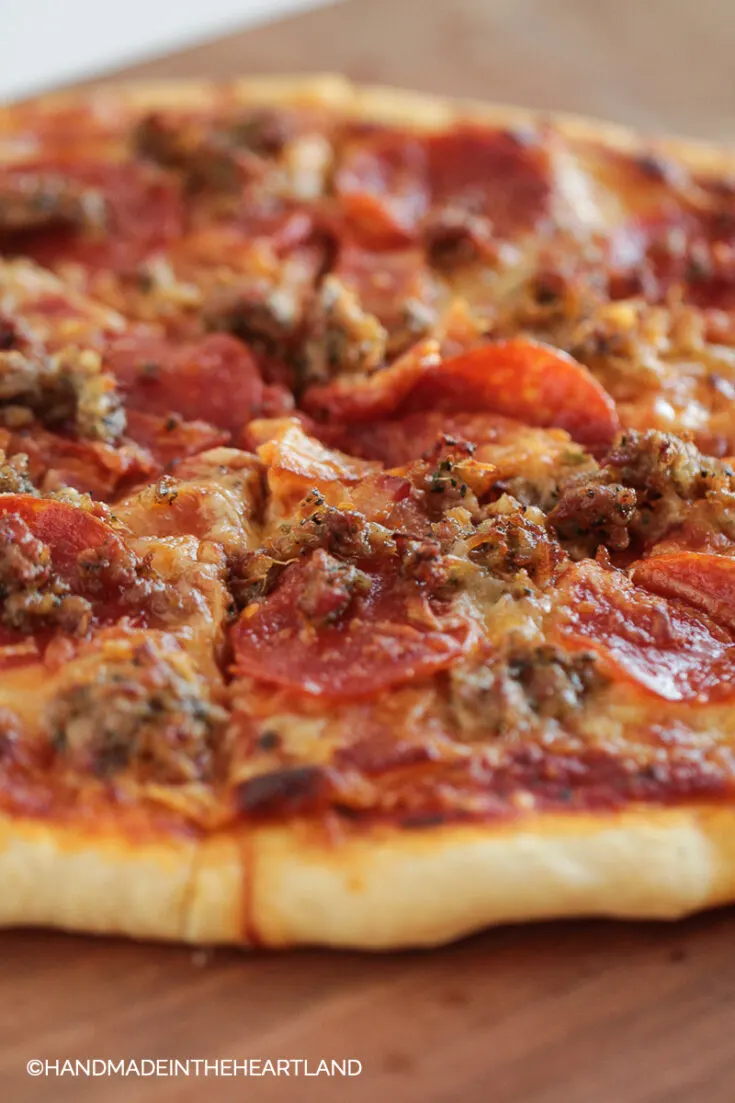
Meat lovers pizza is a classic combination we make in our house every pizza night. With three types of meat and a generous heaping of cheese it’s a traditional pizza everyone loves.


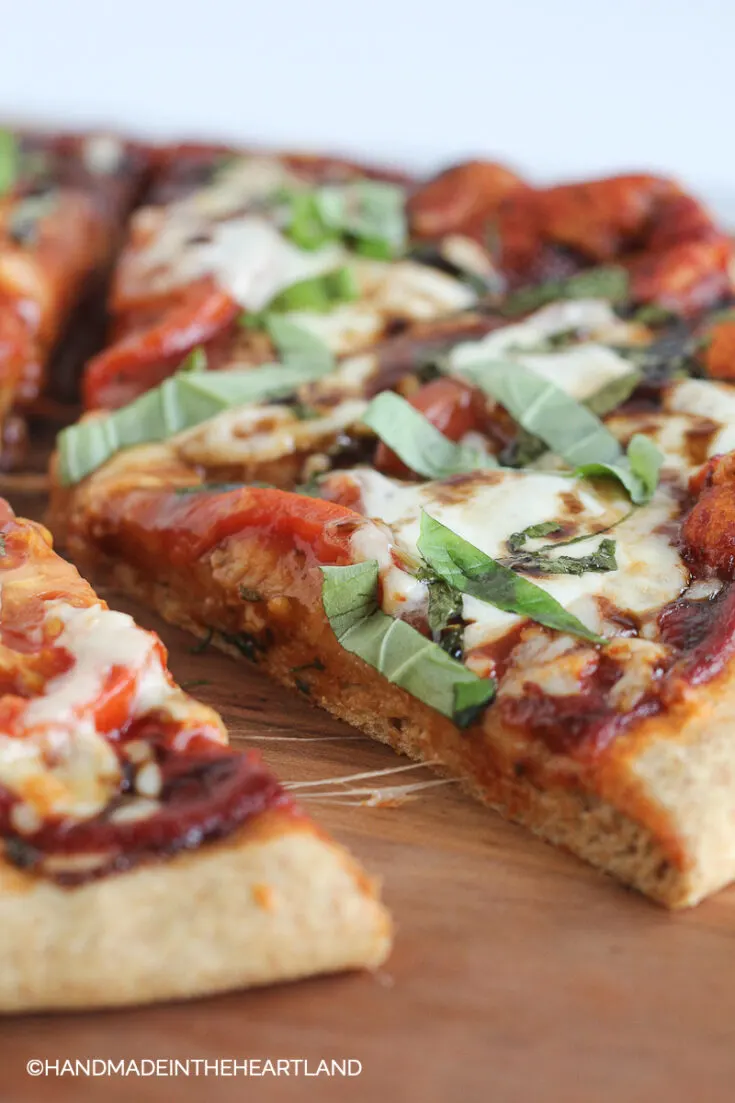
This recipe for caprese pizza takes the flavor of your favorite caprese salad and makes it into a pizza! It’s fresh and full of flavor and a departure from the boring pepperoni pizza you’ve been making.

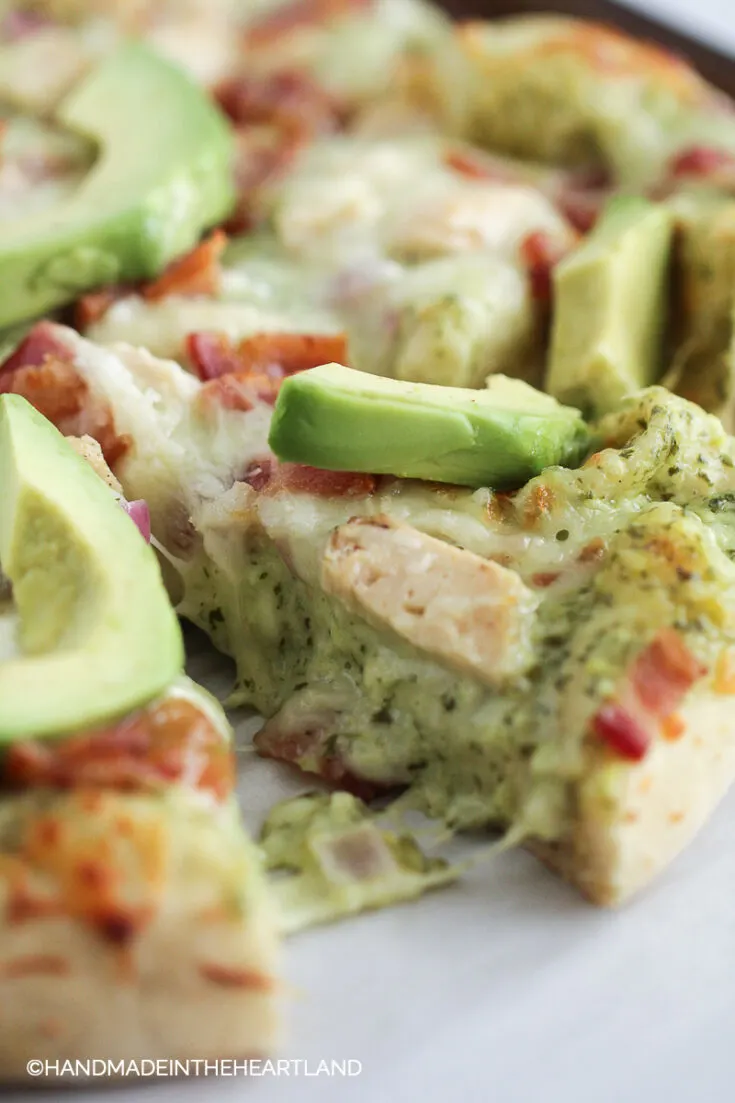
Our family loves this delicious homemade chicken bacon ranch pizza. The combination is a tasty break from traditional pepperoni and will get you excited about pizza night!
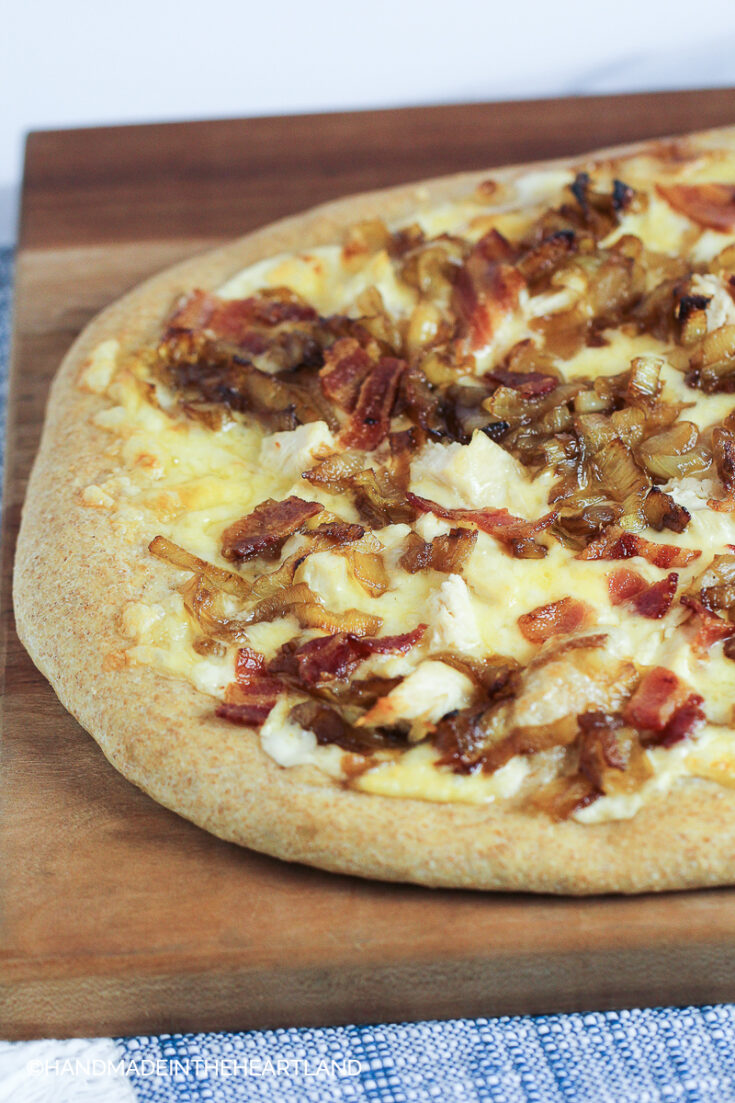

Make this chicken apple & caramelized onion pizza to bring fall flavors in full force to homemade pizza night!

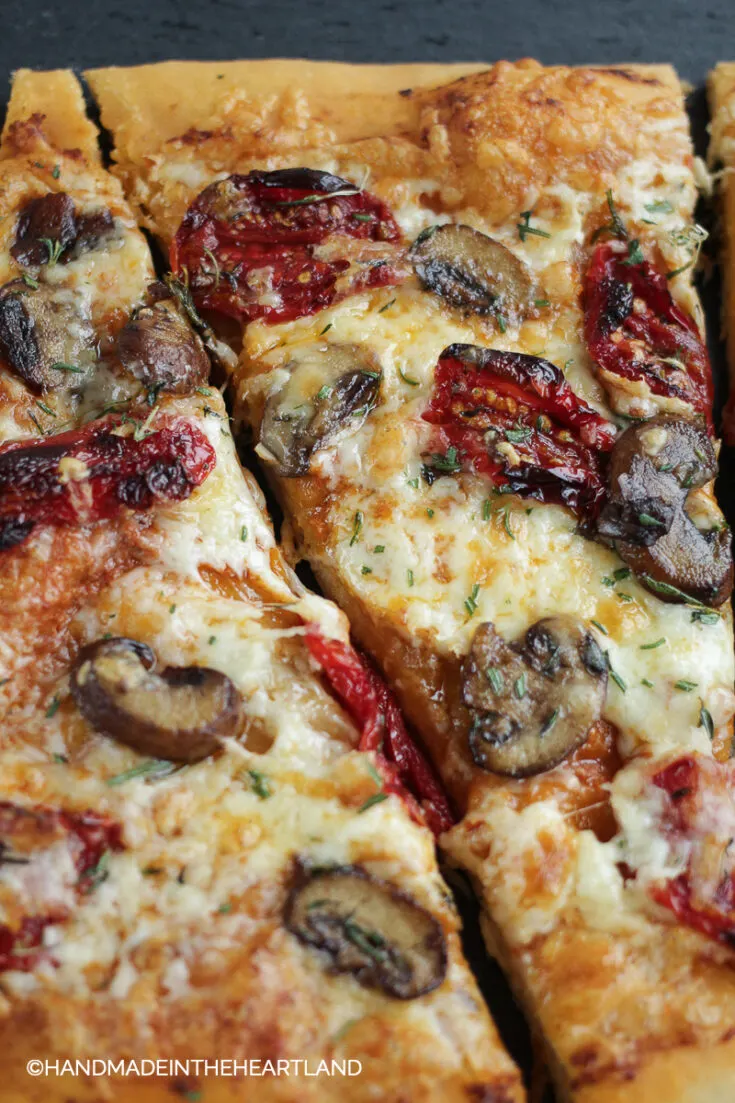
This mushroom & sun-dried tomato pizza recipe is full of delicious flavors that will get you excited about making homemade pizza. It’s a welcome departure from boring pepperoni pizza and I promise you’re going to love it!

Pizza is a great and inexpensive option for feeding a crowd and if you’re up for making a bunch of pizza’s you can totally feed a large group with homemade pizza instead of spending a ton ordering delivery.
Chicken Bacon Ranch Pizza | Handmade in the Heartland
Wednesday 10th of February 2021
[…] simple and only calls for a few ingredients. If you want more guidance make sure to ready my post How to Make Pizza Dough, it has everything you need to know! Pizza dough is a lean dough that’s low in fat and sugar […]
Meat Lovers Pizza | Handmade in the Heartland
Wednesday 10th of February 2021
[…] and only calls for a few ingredients. If you want more guidance make sure to ready my post How to Make Pizza Dough, it has everything you need to know! Pizza dough is a lean dough that’s low in fat and sugar […]
Homemade Pizza | Handmade in the Heartland
Wednesday 10th of February 2021
[…] and only calls for a few ingredients. If you want more guidance make sure to ready my post How to Make Pizza Dough, it has everything you need to know! Pizza dough is a lean dough that’s low in fat and sugar […]
How to Cook Pizza for a Crowd | Handmade in the Heartland
Wednesday 10th of February 2021
[…] We all have a friend who is totally sick of pizza. Make them love pizza again with one of these delicious and unique recipes. Get all my tips for great pizza in my posts: Homemade Pizza and How to Make Pizza Dough. […]
Caprese Pizza | Handmade in the Heartland
Wednesday 10th of February 2021
[…] and only calls for a few ingredients. If you want more guidance make sure to ready my post How to Make Pizza Dough, it has everything you need to know! Pizza dough is a lean dough that’s low in fat and sugar […]